Jumat, 30 November 2012 @ 05.24


Obsessed with this side-heavy look- and as you can see below it’s all over the red carpet. It’s kind of got this sort of 90′s feel to it which I’ve really been digging. The weight of the hair feels very a-symmetric and it takes a whole 15 min to create this look. Here’s how it’s done:
- Find your super-deep part. Try lining it up with the very outside of your brow first. If that feels like it’s just too much, go a little closer in and line up with the arch of your brow.This could potentially feel a little uncomfortable at first if you’re not used parting so far over. If you really hate having that deep side part or if your hair just won’t cooperate for some reason, try doing what I did on Lucy Hale below– see how I went on a diagonal? It starts a little closer to the center and then diagonally goes into a heavier part. This way you get all the weight of the hair on one side but it doesn’t feel overly swooped. Don’t be afraid to take a blowdryer to it to get it to behave!
- Use the finer side of a comb + some strong holding hairspray to make the side tight as you see in photo 2. Don’t over spray, you just want the hair close the head and the fly-aways to stay down. If you really wanted to go for a sleek side, you could gel it and give it that “shaved side” appearance which feels equally edgy + girly!
- Now split the hair diagonally from the back of the part to the opposite corner of your neck. Start the braid behind your ear and go down and around as you see in photo 3. Use a tiny clear elastic to secure the braid on the opposite side of your neck. This elastic will be hidden underneath the other side with all the hair.
- That’s it! Now you’re free to create whatever texture you want on the heavier side– smooth waves, messy waves, curl, straight, anything you like. Personally I like the messy waves with a little volume (like you see in the very top photo) but you really can do this using any natural texture.

Label: beautiful, christmas, fashion, hair, inspiration, looks, make up, must read, pretty, products, snow, winter
Senin, 09 Juli 2012 @ 06.34
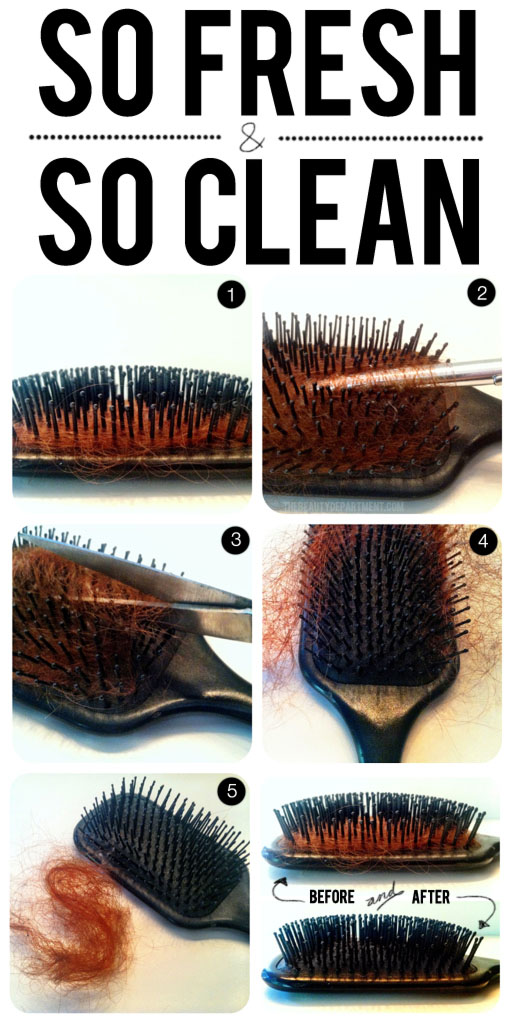
This might seem pretty obvious to some people, but you’d be surprised at how many lovely ladies don’t clean out their hair brushes. Too often I walk into a friend’s bathroom, see a brush full of hair and I can’t help myself, so I clean it out. Within the next couple days I usually hear about how much it changed the way their hair looks. It may not seem like a big deal but hair brushes are total traps! Dust, conditioner, oil, germs, even dust mites can be in your dirty hair brush, which is DISGUSTING. For example: if you wash, brush and blowdry your hair on a Monday and then “re-finish” it on Tuesday with the same brush, the oils and dirt from all day Monday will be sitting in that brush. Pile those up for a couple weeks, months… years? Ew. Personally, I recommend you clean out your brush once every week or two. It takes a couple minutes! It’s not something we really think about but you should try to become conscious of the hair piling up in your brush. Cleaning out your round brushes will allow you to get SO much more tension which will lead to smoothness and shine. Here’s how I like to clean out my brushes at home:
- Grab any brush that’s gathered a visible amount of hair. Here I’m showing you how to clean out a flat (paddle) brush but this can be done exactly the same on a round brush.
- In the hair world, we have tools to clean out brushes, but when I’m at home I grab a pen or pencil and slide it under the hair in the brush. Now pull up until the hair starts to loosen. (You do this so you don’t end up cutting your bristles with the next step!)
- Next, go in with your scissors and cut straight down the middle as seen above. TIP: If you’re cleaning out a round brush, flip it over and do the same on the opposite side.
- Now “peel” the hair open and remove. You can go back in with your pen or pencil to loosen up any more tight spots.
- Discard that gorgeous hairball.
- I like to shampoo my brushes each time I clean out the hair. To do that, just fill up the sink with warm water and add a tablespoon of cleansing/clarifying shampoo. Wash the brush + bristles thoroughly, rinse well, and let it dry (or blow it dry).
Label: beauty, brushes, clean, cleaning, diy, hair, pretty, tips
Sabtu, 11 Februari 2012 @ 05.35
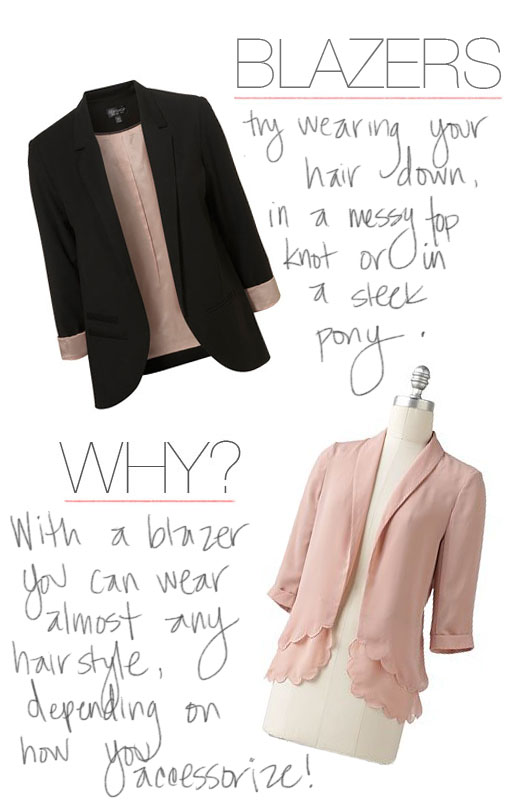
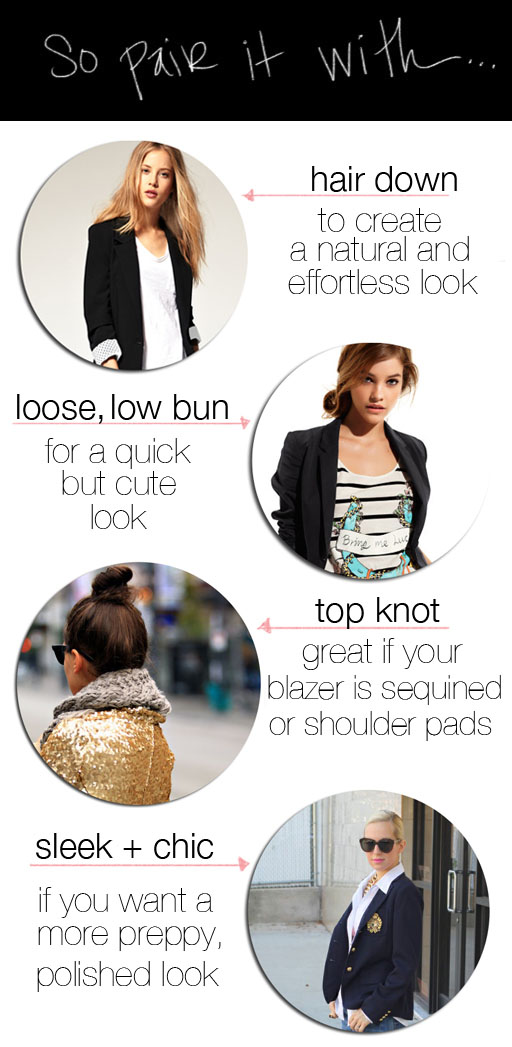
Let’s talk about the eternally classic BLAZER!! The possibilities for hair styles are endless when you’re sporting a blazer. You can do just about anything, but– the deciding factor will usually be how you style + accessorize your blazer. Above are a few good examples.
- Hair down- If you’re headed into a meeting, to the office or off to school, you can never go wrong with wearing your hair down. Loose waves or pin straight, down is a safe bet.
- Loose, low bun or pony- so simple and fast! Just throw your “slept on texture” into a low bun or loose pony. Take the hairs that fall out around your face and give them a little help with a large curling iron. Maybe even make a tiny braid with one piece and bobby pin it back into the bun or pony. It makes it look like you tried when really it took under 5 minutes. Such a cute casual collegiate vibe!
- Top knot- If you’re wearing a statement blazer (with shoulder pads, sequined, or heavy embellishments) let it do all the work! Pull your hair up, up, up. Try a top knot. Smooth or messy. Either way, that puts the focus on the blazer!
- Sleek + chic- This can be a very powerful look. It just looks like this girl has got it together! We would wear this hair with a blazer if we were doing a presentation, going for an interview, or heading to a very stylish party.
Label: blazer, fashion, hair, hair do
Jumat, 12 Agustus 2011 @ 21.29
 Alright, so looking at hair under a microscope is always a little bit creepy + gross. I’m only showing you this with the hopes that it might change the way you treat your hair. Once you know the cause of damage, it’s easier to prevent it, right? Here’s the long and the short of it: Alright, so looking at hair under a microscope is always a little bit creepy + gross. I’m only showing you this with the hopes that it might change the way you treat your hair. Once you know the cause of damage, it’s easier to prevent it, right? Here’s the long and the short of it:
a. This is a close look at healthy hair. The cuticle (the outer layer) lays smooth. All of it’s “scales” are lined up and flat, one on top of the other. Flat cuticles = smooth surface. Smooth surface = light reflection. Light reflection = more SHINE!
b. This is a slightly raised cuticle. I would say this is what the average person’s hair looks like if they use a blow dryer. The other cause of slightly raised cuticle can be towel drying. It’s okay to towel dry it but don’t rough it up. Work your way down the hair. Or gently scrunch it if you’re going for waves. As I mentioned in a previous post, t-shirt drying is much safer than towel drying and it helps to eliminate frizz big time.
c. This is an extremely raised cuticle. Main causes are bleaching, over-processing with color, over-styling with heat, using too many alcohol based products in conjunction with heat styling, shampooing and not conditioning, etc… This is bad news. When your cuticle looks like this your hair will appear dull, and lifeless. It can’t reflect shine when the surface is broken up this way. Hair Bootcamp is a must for this hair. (Which just so happens to be one of my posts for next week!) If you don’t change your routine, you’ll be looking at breakage very soon.
d. Here we have a piece of hair that WILL eventually break off. This was most likely caused by harsh detangling. Never rush through a knot. Take your time and comb it out slowly. I also recommend getting knots out with a brush instead of a comb. Sometimes the single row of teeth on a comb can actually tighten the knot. I always work knots out slowly with a brush. Another may-jor cause of this is yanking out a ponytail holder. Stop yourself and work the tangle around the ponytail holder out slowly. Sadly, once this has happened in the middle of a piece of hair, it’s definitely coming off. Collect a bunch of these and you’ve got yourself a nice case of the fly-aways! Booooo.
e. Well hello split-end. This is the enemy!! I’m actually really happy that you guys are seeing this because just knowing what split ends looks like will help you understand how they get stuck on each other. They’re like claws that can grab onto one another causing tangles. Tangled ends cause even further damage. It’s important to get them off regularly.
f. This is knotted hair. If not properly and carefully brushed out, a knot will lead to “example d.” If you gently brush it out, you can avoid that. (Also, this is just a really cool look at knotted hair!)
g. This is a shattered hair shaft. This can be caused by a bad application or rough removal of extensions. Another cause could be a bad perm (solution, the way it’s wrapped and how it’s processed). Not sure too many of you are getting perms, but if you are, please be sure to visit someone who specializes in that. Not just someone who will say yes because they want to make the money from the service. If you have extensions, make sure the person doing them is gentle, takes their time and isn’t too aggressive with your delicate hair!
Whatever kind of hair you have, you’re now one big step closer to “example a.” above. We’ve got to be good to our hair! Learn it + love it. xLabel: beauty, hair, must read, tips
Sabtu, 25 Juni 2011 @ 00.15
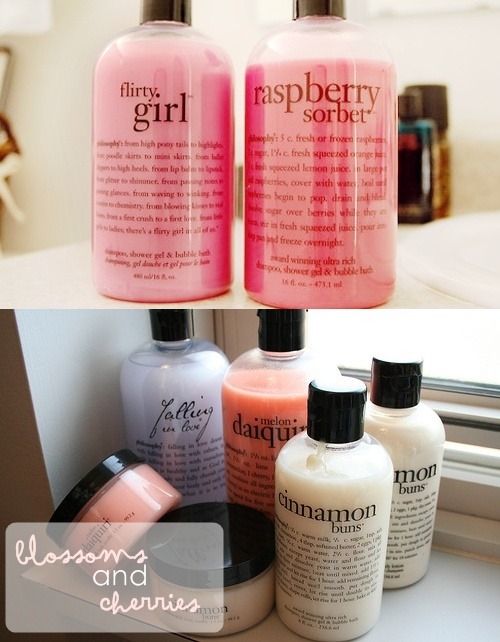
shower gel, bubble bath, moisturizer
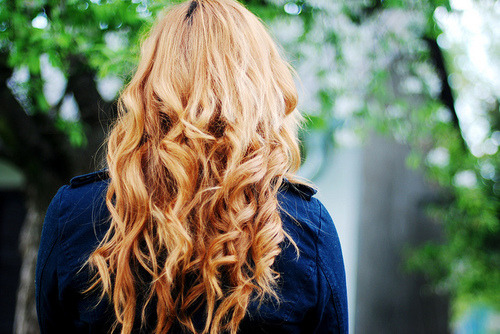
half curly hair
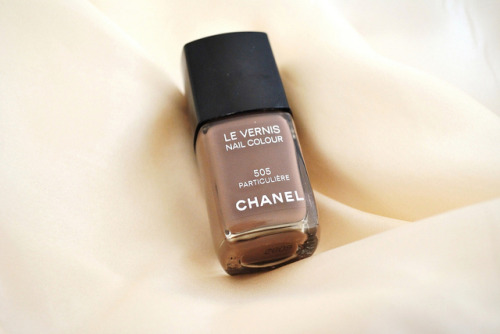
chanel nail polish
all items on the pictures above! <3 Label: hair, nail polish, wish list
|
Jumat, 30 November 2012 @ 05.24
Obsessed with this side-heavy look- and as you can see below it’s all over the red carpet. It’s kind of got this sort of 90′s feel to it which I’ve really been digging. The weight of the hair feels very a-symmetric and it takes a whole 15 min to create this look. Here’s how it’s done:
- Find your super-deep part. Try lining it up with the very outside of your brow first. If that feels like it’s just too much, go a little closer in and line up with the arch of your brow.This could potentially feel a little uncomfortable at first if you’re not used parting so far over. If you really hate having that deep side part or if your hair just won’t cooperate for some reason, try doing what I did on Lucy Hale below– see how I went on a diagonal? It starts a little closer to the center and then diagonally goes into a heavier part. This way you get all the weight of the hair on one side but it doesn’t feel overly swooped. Don’t be afraid to take a blowdryer to it to get it to behave!
- Use the finer side of a comb + some strong holding hairspray to make the side tight as you see in photo 2. Don’t over spray, you just want the hair close the head and the fly-aways to stay down. If you really wanted to go for a sleek side, you could gel it and give it that “shaved side” appearance which feels equally edgy + girly!
- Now split the hair diagonally from the back of the part to the opposite corner of your neck. Start the braid behind your ear and go down and around as you see in photo 3. Use a tiny clear elastic to secure the braid on the opposite side of your neck. This elastic will be hidden underneath the other side with all the hair.
- That’s it! Now you’re free to create whatever texture you want on the heavier side– smooth waves, messy waves, curl, straight, anything you like. Personally I like the messy waves with a little volume (like you see in the very top photo) but you really can do this using any natural texture.
Label: beautiful, christmas, fashion, hair, inspiration, looks, make up, must read, pretty, products, snow, winter
Senin, 09 Juli 2012 @ 06.34
This might seem pretty obvious to some people, but you’d be surprised at how many lovely ladies don’t clean out their hair brushes. Too often I walk into a friend’s bathroom, see a brush full of hair and I can’t help myself, so I clean it out. Within the next couple days I usually hear about how much it changed the way their hair looks. It may not seem like a big deal but hair brushes are total traps! Dust, conditioner, oil, germs, even dust mites can be in your dirty hair brush, which is DISGUSTING. For example: if you wash, brush and blowdry your hair on a Monday and then “re-finish” it on Tuesday with the same brush, the oils and dirt from all day Monday will be sitting in that brush. Pile those up for a couple weeks, months… years? Ew. Personally, I recommend you clean out your brush once every week or two. It takes a couple minutes! It’s not something we really think about but you should try to become conscious of the hair piling up in your brush. Cleaning out your round brushes will allow you to get SO much more tension which will lead to smoothness and shine. Here’s how I like to clean out my brushes at home:
- Grab any brush that’s gathered a visible amount of hair. Here I’m showing you how to clean out a flat (paddle) brush but this can be done exactly the same on a round brush.
- In the hair world, we have tools to clean out brushes, but when I’m at home I grab a pen or pencil and slide it under the hair in the brush. Now pull up until the hair starts to loosen. (You do this so you don’t end up cutting your bristles with the next step!)
- Next, go in with your scissors and cut straight down the middle as seen above. TIP: If you’re cleaning out a round brush, flip it over and do the same on the opposite side.
- Now “peel” the hair open and remove. You can go back in with your pen or pencil to loosen up any more tight spots.
- Discard that gorgeous hairball.
- I like to shampoo my brushes each time I clean out the hair. To do that, just fill up the sink with warm water and add a tablespoon of cleansing/clarifying shampoo. Wash the brush + bristles thoroughly, rinse well, and let it dry (or blow it dry).
Label: beauty, brushes, clean, cleaning, diy, hair, pretty, tips
Sabtu, 11 Februari 2012 @ 05.35
Let’s talk about the eternally classic BLAZER!! The possibilities for hair styles are endless when you’re sporting a blazer. You can do just about anything, but– the deciding factor will usually be how you style + accessorize your blazer. Above are a few good examples.
- Hair down- If you’re headed into a meeting, to the office or off to school, you can never go wrong with wearing your hair down. Loose waves or pin straight, down is a safe bet.
- Loose, low bun or pony- so simple and fast! Just throw your “slept on texture” into a low bun or loose pony. Take the hairs that fall out around your face and give them a little help with a large curling iron. Maybe even make a tiny braid with one piece and bobby pin it back into the bun or pony. It makes it look like you tried when really it took under 5 minutes. Such a cute casual collegiate vibe!
- Top knot- If you’re wearing a statement blazer (with shoulder pads, sequined, or heavy embellishments) let it do all the work! Pull your hair up, up, up. Try a top knot. Smooth or messy. Either way, that puts the focus on the blazer!
- Sleek + chic- This can be a very powerful look. It just looks like this girl has got it together! We would wear this hair with a blazer if we were doing a presentation, going for an interview, or heading to a very stylish party.
Label: blazer, fashion, hair, hair do
Jumat, 12 Agustus 2011 @ 21.29
Alright, so looking at hair under a microscope is always a little bit creepy + gross. I’m only showing you this with the hopes that it might change the way you treat your hair. Once you know the cause of damage, it’s easier to prevent it, right? Here’s the long and the short of it:
a. This is a close look at healthy hair. The cuticle (the outer layer) lays smooth. All of it’s “scales” are lined up and flat, one on top of the other. Flat cuticles = smooth surface. Smooth surface = light reflection. Light reflection = more SHINE!
b. This is a slightly raised cuticle. I would say this is what the average person’s hair looks like if they use a blow dryer. The other cause of slightly raised cuticle can be towel drying. It’s okay to towel dry it but don’t rough it up. Work your way down the hair. Or gently scrunch it if you’re going for waves. As I mentioned in a previous post, t-shirt drying is much safer than towel drying and it helps to eliminate frizz big time.
c. This is an extremely raised cuticle. Main causes are bleaching, over-processing with color, over-styling with heat, using too many alcohol based products in conjunction with heat styling, shampooing and not conditioning, etc… This is bad news. When your cuticle looks like this your hair will appear dull, and lifeless. It can’t reflect shine when the surface is broken up this way. Hair Bootcamp is a must for this hair. (Which just so happens to be one of my posts for next week!) If you don’t change your routine, you’ll be looking at breakage very soon.
d. Here we have a piece of hair that WILL eventually break off. This was most likely caused by harsh detangling. Never rush through a knot. Take your time and comb it out slowly. I also recommend getting knots out with a brush instead of a comb. Sometimes the single row of teeth on a comb can actually tighten the knot. I always work knots out slowly with a brush. Another may-jor cause of this is yanking out a ponytail holder. Stop yourself and work the tangle around the ponytail holder out slowly. Sadly, once this has happened in the middle of a piece of hair, it’s definitely coming off. Collect a bunch of these and you’ve got yourself a nice case of the fly-aways! Booooo.
e. Well hello split-end. This is the enemy!! I’m actually really happy that you guys are seeing this because just knowing what split ends looks like will help you understand how they get stuck on each other. They’re like claws that can grab onto one another causing tangles. Tangled ends cause even further damage. It’s important to get them off regularly.
f. This is knotted hair. If not properly and carefully brushed out, a knot will lead to “example d.” If you gently brush it out, you can avoid that. (Also, this is just a really cool look at knotted hair!)
g. This is a shattered hair shaft. This can be caused by a bad application or rough removal of extensions. Another cause could be a bad perm (solution, the way it’s wrapped and how it’s processed). Not sure too many of you are getting perms, but if you are, please be sure to visit someone who specializes in that. Not just someone who will say yes because they want to make the money from the service. If you have extensions, make sure the person doing them is gentle, takes their time and isn’t too aggressive with your delicate hair!
Whatever kind of hair you have, you’re now one big step closer to “example a.” above. We’ve got to be good to our hair! Learn it + love it. xLabel: beauty, hair, must read, tips
Sabtu, 25 Juni 2011 @ 00.15
shower gel, bubble bath, moisturizer
half curly hair
chanel nail polish
all items on the pictures above! <3 Label: hair, nail polish, wish list
|
Natasha ♥
YOU KNOW YOU LOVE ME

Hi there. I'm Natasha Diva, I'm 16 years old. Currently living in Jakaera, Indonesia. Well. I love pink, I'm girly, I'm simple, I'm good. Chocolate is my guilty pleasure. Late night dramas are my thing. I don't believe in monsters, but I suspect there's on in my closet eating up all my Chanel bags. A huge fan of PINK from Victoria's Secret. xo
What more can I say? (:
Twitter

|
|
|
|