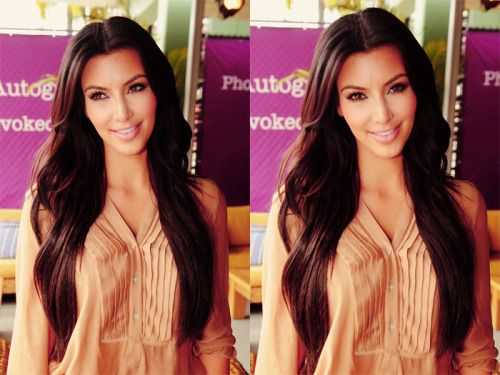
Jumat, 30 November 2012 @ 05.24


Obsessed with this side-heavy look- and as you can see below it’s all over the red carpet. It’s kind of got this sort of 90′s feel to it which I’ve really been digging. The weight of the hair feels very a-symmetric and it takes a whole 15 min to create this look. Here’s how it’s done:
- Find your super-deep part. Try lining it up with the very outside of your brow first. If that feels like it’s just too much, go a little closer in and line up with the arch of your brow.This could potentially feel a little uncomfortable at first if you’re not used parting so far over. If you really hate having that deep side part or if your hair just won’t cooperate for some reason, try doing what I did on Lucy Hale below– see how I went on a diagonal? It starts a little closer to the center and then diagonally goes into a heavier part. This way you get all the weight of the hair on one side but it doesn’t feel overly swooped. Don’t be afraid to take a blowdryer to it to get it to behave!
- Use the finer side of a comb + some strong holding hairspray to make the side tight as you see in photo 2. Don’t over spray, you just want the hair close the head and the fly-aways to stay down. If you really wanted to go for a sleek side, you could gel it and give it that “shaved side” appearance which feels equally edgy + girly!
- Now split the hair diagonally from the back of the part to the opposite corner of your neck. Start the braid behind your ear and go down and around as you see in photo 3. Use a tiny clear elastic to secure the braid on the opposite side of your neck. This elastic will be hidden underneath the other side with all the hair.
- That’s it! Now you’re free to create whatever texture you want on the heavier side– smooth waves, messy waves, curl, straight, anything you like. Personally I like the messy waves with a little volume (like you see in the very top photo) but you really can do this using any natural texture.

Label: beautiful, christmas, fashion, hair, inspiration, looks, make up, must read, pretty, products, snow, winter
Jumat, 15 Juni 2012 @ 00.29

Don’t you just want to cry when you drop your brand new compact and the powder shatters into a million little pieces? But wait! Don’t throw it out and call your losses. You can absolutely put humpty dumpty back together again! And while you’re at it, grab your old cream shadow, blush or liner that has dried out, cracked or shrunk and bring it back to life too. Here’s how to do both:
POWER TOOLS: 70% alcohol {it works 1000 times better for this than your typical rubbing alcohol from the drug store and can be purchased at your local art supply}, plastic wrap, spatula, dropper, synthetic eyeliner brush {I used this favorite go-to liner brush for its round edges and stiff short bristles}, Q-tip {optional if you’re a perfectionist… you know who you are!}
WRAP IT UP: Completely cover the compact with the plastic wrap and make sure it adheres tightly to contain everything.
MASH IT UP: With your spatula, crush up the entire pan of shadow, not just the broken pieces. You essentially are turning the pressed powder back into loose powder.
ADD ALCOHOL: Remove the wrap and add at least 10 droppers full of alcohol. You can add a few droppers full at a time to see how much you need. I used a dozen.
SMOOTH IT OVER: Now you’ll feel the powder has become sponge-like and very pliable, giving you the perfect opportunity to even it out smoothly with your spatula.
PERFECT THE EDGES: Use your eyeliner brush to smooth it out even further. Give it a few hours to completely dry and it’s like it never happened! To make it extra pretty, clean up the perimeter with a Q-tip
. 
To revive your dried-out and cracked old cream shadow, apply the same steps except there’s no need to wrap it up or mash it up. Just add alcohol to reactivate it, stir it, smooth it out and perfect the edges. If you’re like us, you hate waste and these are two great ways to save and use what you have!
Label: alcohol, beauty, diy, girls talk, important, make up, must read, products, tips
Jumat, 16 September 2011 @ 05.37

Fall fashion is finally here and as we store away our jean cut-offs and bikinis, we have the chance to change up our makeup a little too. All my life I’ve always passed over lip colors in the brick/brown/rust/pumpkin family because they just didn’t seem pretty to me or like they’d do anything for me or my clients. What a closed mind I had! They don’t just look gorgeous on redheads, they look good on everyone, especially as we lose our summer tans. You just have to broaden your concept as to what you’ve always thought was pretty and give it a try; because it’s a very sophisticated look when you’re ready to see yourself that way.
You can go soft with a rusty nude or caramel or go bold with a deep orange. I would suggest pairing it with a simple eye… a bone or wheat shadow and black mascara complement it beautifully.Label: beauty, fall, make up, tips
Sabtu, 23 Juli 2011 @ 02.41
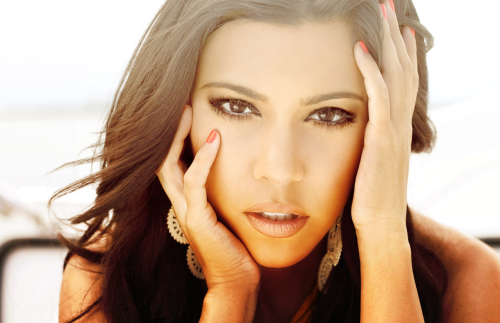
geez, tomorrow is my bestfriend's birthday! and next saturday we're gonna celebrate it. I really don't know what to do with my hair and make up. usually, I only wear powder, transparent mascara, and lip gloss. is that enough? hmmm, I want something different now. I want my hair to be different, anybody have some hair dos tutorial on youtube? because I really need it. I want to look a bit different. :) and ohh.. the outfit. I'm still confused too. DAMN! D: I'll try to look on my wardrobe and mix + match some clothes.
anyway, I am so inspired by the Kardashians. they're so glamourous! everything. their life, make up, hair do, and everything. I just love them. anyway, I want my hair to look like this on my friend's bday party. but I don't know how to do it :( someone please give me the link of the tutorial if you have any.. thanks xxLabel: hair do, kim kardashian, make up, party
|
Jumat, 30 November 2012 @ 05.24
Obsessed with this side-heavy look- and as you can see below it’s all over the red carpet. It’s kind of got this sort of 90′s feel to it which I’ve really been digging. The weight of the hair feels very a-symmetric and it takes a whole 15 min to create this look. Here’s how it’s done:
- Find your super-deep part. Try lining it up with the very outside of your brow first. If that feels like it’s just too much, go a little closer in and line up with the arch of your brow.This could potentially feel a little uncomfortable at first if you’re not used parting so far over. If you really hate having that deep side part or if your hair just won’t cooperate for some reason, try doing what I did on Lucy Hale below– see how I went on a diagonal? It starts a little closer to the center and then diagonally goes into a heavier part. This way you get all the weight of the hair on one side but it doesn’t feel overly swooped. Don’t be afraid to take a blowdryer to it to get it to behave!
- Use the finer side of a comb + some strong holding hairspray to make the side tight as you see in photo 2. Don’t over spray, you just want the hair close the head and the fly-aways to stay down. If you really wanted to go for a sleek side, you could gel it and give it that “shaved side” appearance which feels equally edgy + girly!
- Now split the hair diagonally from the back of the part to the opposite corner of your neck. Start the braid behind your ear and go down and around as you see in photo 3. Use a tiny clear elastic to secure the braid on the opposite side of your neck. This elastic will be hidden underneath the other side with all the hair.
- That’s it! Now you’re free to create whatever texture you want on the heavier side– smooth waves, messy waves, curl, straight, anything you like. Personally I like the messy waves with a little volume (like you see in the very top photo) but you really can do this using any natural texture.
Label: beautiful, christmas, fashion, hair, inspiration, looks, make up, must read, pretty, products, snow, winter
Jumat, 15 Juni 2012 @ 00.29
Don’t you just want to cry when you drop your brand new compact and the powder shatters into a million little pieces? But wait! Don’t throw it out and call your losses. You can absolutely put humpty dumpty back together again! And while you’re at it, grab your old cream shadow, blush or liner that has dried out, cracked or shrunk and bring it back to life too. Here’s how to do both:
POWER TOOLS: 70% alcohol {it works 1000 times better for this than your typical rubbing alcohol from the drug store and can be purchased at your local art supply}, plastic wrap, spatula, dropper, synthetic eyeliner brush {I used this favorite go-to liner brush for its round edges and stiff short bristles}, Q-tip {optional if you’re a perfectionist… you know who you are!}
WRAP IT UP: Completely cover the compact with the plastic wrap and make sure it adheres tightly to contain everything.
MASH IT UP: With your spatula, crush up the entire pan of shadow, not just the broken pieces. You essentially are turning the pressed powder back into loose powder.
ADD ALCOHOL: Remove the wrap and add at least 10 droppers full of alcohol. You can add a few droppers full at a time to see how much you need. I used a dozen.
SMOOTH IT OVER: Now you’ll feel the powder has become sponge-like and very pliable, giving you the perfect opportunity to even it out smoothly with your spatula.
PERFECT THE EDGES: Use your eyeliner brush to smooth it out even further. Give it a few hours to completely dry and it’s like it never happened! To make it extra pretty, clean up the perimeter with a Q-tip
.
To revive your dried-out and cracked old cream shadow, apply the same steps except there’s no need to wrap it up or mash it up. Just add alcohol to reactivate it, stir it, smooth it out and perfect the edges. If you’re like us, you hate waste and these are two great ways to save and use what you have!
Label: alcohol, beauty, diy, girls talk, important, make up, must read, products, tips
Jumat, 16 September 2011 @ 05.37
Fall fashion is finally here and as we store away our jean cut-offs and bikinis, we have the chance to change up our makeup a little too. All my life I’ve always passed over lip colors in the brick/brown/rust/pumpkin family because they just didn’t seem pretty to me or like they’d do anything for me or my clients. What a closed mind I had! They don’t just look gorgeous on redheads, they look good on everyone, especially as we lose our summer tans. You just have to broaden your concept as to what you’ve always thought was pretty and give it a try; because it’s a very sophisticated look when you’re ready to see yourself that way.
You can go soft with a rusty nude or caramel or go bold with a deep orange. I would suggest pairing it with a simple eye… a bone or wheat shadow and black mascara complement it beautifully.Label: beauty, fall, make up, tips
Sabtu, 23 Juli 2011 @ 02.41
geez, tomorrow is my bestfriend's birthday! and next saturday we're gonna celebrate it. I really don't know what to do with my hair and make up. usually, I only wear powder, transparent mascara, and lip gloss. is that enough? hmmm, I want something different now. I want my hair to be different, anybody have some hair dos tutorial on youtube? because I really need it. I want to look a bit different. :) and ohh.. the outfit. I'm still confused too. DAMN! D: I'll try to look on my wardrobe and mix + match some clothes.
anyway, I am so inspired by the Kardashians. they're so glamourous! everything. their life, make up, hair do, and everything. I just love them. anyway, I want my hair to look like this on my friend's bday party. but I don't know how to do it :( someone please give me the link of the tutorial if you have any.. thanks xxLabel: hair do, kim kardashian, make up, party
|
Natasha ♥
YOU KNOW YOU LOVE ME

Hi there. I'm Natasha Diva, I'm 16 years old. Currently living in Jakaera, Indonesia. Well. I love pink, I'm girly, I'm simple, I'm good. Chocolate is my guilty pleasure. Late night dramas are my thing. I don't believe in monsters, but I suspect there's on in my closet eating up all my Chanel bags. A huge fan of PINK from Victoria's Secret. xo
What more can I say? (:
Twitter

|
|
|
|