Senin, 09 Juli 2012 @ 06.34
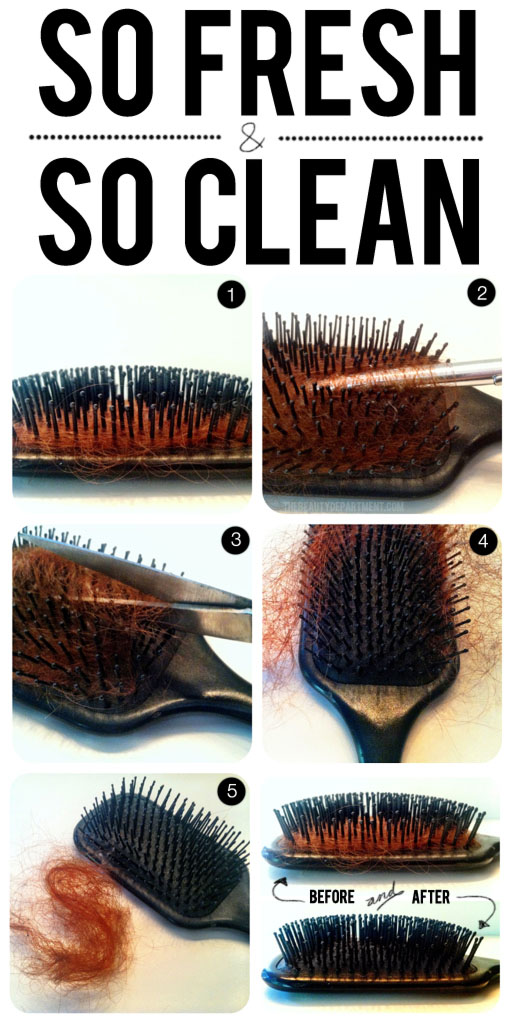
This might seem pretty obvious to some people, but you’d be surprised at how many lovely ladies don’t clean out their hair brushes. Too often I walk into a friend’s bathroom, see a brush full of hair and I can’t help myself, so I clean it out. Within the next couple days I usually hear about how much it changed the way their hair looks. It may not seem like a big deal but hair brushes are total traps! Dust, conditioner, oil, germs, even dust mites can be in your dirty hair brush, which is DISGUSTING. For example: if you wash, brush and blowdry your hair on a Monday and then “re-finish” it on Tuesday with the same brush, the oils and dirt from all day Monday will be sitting in that brush. Pile those up for a couple weeks, months… years? Ew. Personally, I recommend you clean out your brush once every week or two. It takes a couple minutes! It’s not something we really think about but you should try to become conscious of the hair piling up in your brush. Cleaning out your round brushes will allow you to get SO much more tension which will lead to smoothness and shine. Here’s how I like to clean out my brushes at home:
- Grab any brush that’s gathered a visible amount of hair. Here I’m showing you how to clean out a flat (paddle) brush but this can be done exactly the same on a round brush.
- In the hair world, we have tools to clean out brushes, but when I’m at home I grab a pen or pencil and slide it under the hair in the brush. Now pull up until the hair starts to loosen. (You do this so you don’t end up cutting your bristles with the next step!)
- Next, go in with your scissors and cut straight down the middle as seen above. TIP: If you’re cleaning out a round brush, flip it over and do the same on the opposite side.
- Now “peel” the hair open and remove. You can go back in with your pen or pencil to loosen up any more tight spots.
- Discard that gorgeous hairball.
- I like to shampoo my brushes each time I clean out the hair. To do that, just fill up the sink with warm water and add a tablespoon of cleansing/clarifying shampoo. Wash the brush + bristles thoroughly, rinse well, and let it dry (or blow it dry).
Label: beauty, brushes, clean, cleaning, diy, hair, pretty, tips
Jumat, 15 Juni 2012 @ 00.29

Don’t you just want to cry when you drop your brand new compact and the powder shatters into a million little pieces? But wait! Don’t throw it out and call your losses. You can absolutely put humpty dumpty back together again! And while you’re at it, grab your old cream shadow, blush or liner that has dried out, cracked or shrunk and bring it back to life too. Here’s how to do both:
POWER TOOLS: 70% alcohol {it works 1000 times better for this than your typical rubbing alcohol from the drug store and can be purchased at your local art supply}, plastic wrap, spatula, dropper, synthetic eyeliner brush {I used this favorite go-to liner brush for its round edges and stiff short bristles}, Q-tip {optional if you’re a perfectionist… you know who you are!}
WRAP IT UP: Completely cover the compact with the plastic wrap and make sure it adheres tightly to contain everything.
MASH IT UP: With your spatula, crush up the entire pan of shadow, not just the broken pieces. You essentially are turning the pressed powder back into loose powder.
ADD ALCOHOL: Remove the wrap and add at least 10 droppers full of alcohol. You can add a few droppers full at a time to see how much you need. I used a dozen.
SMOOTH IT OVER: Now you’ll feel the powder has become sponge-like and very pliable, giving you the perfect opportunity to even it out smoothly with your spatula.
PERFECT THE EDGES: Use your eyeliner brush to smooth it out even further. Give it a few hours to completely dry and it’s like it never happened! To make it extra pretty, clean up the perimeter with a Q-tip
. 
To revive your dried-out and cracked old cream shadow, apply the same steps except there’s no need to wrap it up or mash it up. Just add alcohol to reactivate it, stir it, smooth it out and perfect the edges. If you’re like us, you hate waste and these are two great ways to save and use what you have!
Label: alcohol, beauty, diy, girls talk, important, make up, must read, products, tips
Minggu, 10 Juni 2012 @ 07.41
IT'S JUNE! SUMMERTIME :D
I know, I haven't been posting a new post since ever. I'm very busy with my school thingy. Projects, exams, homeworks, etc. I don't have any time to open up the computer even surf the internet. so yeah.. it's a spare time for me now to post something here.. :) now that it's June, it's summertime for me here in Indonesia. this year's summer, I'm going to Bali with my family. I can't wait to get in the beach and get tan. :D I haven't packed yet though, it's still 2 weeks to go. but there's some things I couldn't forget to bring to Bali. here they are...
- Sun screen
- Bikinis
- Flip flops
- Hat
- Sunglasses
- A bottle of water
I'm really excited for this year's summer. I hope it's as awesome as last year.. oh well. I will not be posting much anymore in this blog. I hope y'all can enjoy my entries here. xoxo
Label: bali, beauty, bikini, june, summer, tan, tips
Rabu, 18 April 2012 @ 20.26
hey everyone.. here's some tips for your beauty skin, face, and body. enjoy :)

- Tea Tree Oil mixed with Vitamin E supplements is an excellent healing agent. It heals blemishes but also cures scar tissues
- Applying lotion right after you step out of the shower seals in the moisture that your skin has just absorbed.
- Be kind to your skin. Stop using such strong scented soaps, instead use mild unperfumed cleansers.
- For oily skin use some plain Milk of Magnesia, rub it on & let dry, then rinse with lukewarm water. It absorbs oil wonderfully
- Avocados contain healthy fats and vitamins C and E to keep skin plump, bright, and hydrated.
- Long, steamy showers can lead to dry, scaly skin. Opt for lukewarm temps instead to glow from head to toe.
- Alcohol zaps the body of vitamin A, an important antioxidant that is necessary for repairing skin tissue
- Lemon juice is a citric acid which is a part of AHAs group which is an effective home remedy for reducing acne scars.
- Steam your face over a bowl of hot water, cleanse with your usual face wash, & splash with cool water to tighten your clean face
- As an alternative to the usual glass of water, try coconut water. Helps hydrates the skin, helps with weight loss, & treats acne
- Watermelon & cucumbers are loaded with water, so naturally, eating them keeps you & your skin hydrated.
- Add a few cups of milk to your next bath to take advantage of its lactic acid, a natural skin-softener.
- Bananas are full of vitamins & minerals that are good for your face as well as your body.
- Stay away from caffeine. Acne outbreaks are tied to both increased stress levels and sleep deprivation, lower your caffeine intake.
- Strawberries help to tone the skin, lighten any pigmentation problems and keeps the skin smooth and supple.
- Apply thin layer of plain yogurt to freshly cleansed face, throat, & chest, lie down. Rest for 10-20 minutes. Rinse with cool water.
- An apple a day is one of the most delicious prescriptions ever made. Apples are a powerful source of antioxidants.
- Coffee seeds & milk powder: Both in equal quantity & mix with rose water to make paste.Leave it on face for 15mins, rinse.
- Moisturizers work well to treat dry skin. Choose a moisturizer that is hypoallergenic (it should say so on the label)
- The Top two beauty secrets are applying lotion everyday to keep your skin from drying out & becoming wrinkled & Drinking water!
- The most important thing to do if you suffer from Acne is to drink at least four pints of water every day
- By going to bed a little earlier and fighting stress with exercise, you’ll begin to see an improvement in your complexion.
- After showering, moisturize your whole body with lotion! Your body will thank you.
- Great cleanser for acne. Mix fresh lemon juice with rosewater apply to affected skin for 30mins then wash with cold-water
- Using relaxation techniques like yoga, meditation, and massage therapy can be very helpful in getting rid of wrinkles on the face
and the last.. aim for total wellness. Avoid stress, get 7 hours sleep nightly, avoid polluted areas, exercise daily and maintain a good healthy diet. Label: beauty, body, face, skinny, tips
@ 20.09
So annoying– You finish your mani, it looks amazing and then a short time later you look down to see bubbles in your polish. Here are some ways to avoid that problem:
- Don’t shake your polish bottle. Try rolling it between the palms of your hands instead. Shaking the polish vigorously creates a bazillion little bubbles that you can’t see… until they rise! If you absolutely have to shake the bottle to mix your color, do so and then wait about half an hour so all the bubbles can surface before you start your mani.
- Avoid thick polish. The thicker the polish, the longer bubbles will take to surface. A new bottle of polish is thinner and the bubbles rise quicker. You can add a couple drops of polish remover to thin out thick polish, but just remember that adding acetone/remover weakens the bond between the polish and your nail. AKA: it will probably start to chip sooner.
- Keep the lids on your polish. Sometimes we forget to screw the lids down while doing nail art or cleaning up the cuticles. The longer you leave the lid off, the more air gets in and the more the polish will thicken and thick polish is a bubble trap!
- Use a base coat. I don’t think I’ve ever seen bubbles in a base coat. Have you? Laying a proper foundation for your polish is a must when trying to avoid bubbles.
- Do your nails in a cool, dry place. If you’re body temp is up, heat will radiate and can actually cause polish bubbles. If temperatures are high where you are, try using a small fan to dry/cool your nails right after polish is applied. Soaking or running your hands in cold water and then drying them before you start painting can also help if it’s hot out.
- Let the first coat dry completely. I’ve noticed that with some polishes, you have to let the first coat fully dry before applying the second coat to avoid bubbles. If you don’t have time to let the first coat dry entirely, at least make sure you’re using a polish with a “quick dry” label.
- Lift the brush as little as possible. On your first coat, try doing long strokes instead of short quick strokes with the brush. I find that the quicker shorter strokes will push air into the polish. If you need to do short quick strokes to get to a certain spot, do it on the second round after the first coat dries all the way.
Label: girls talk, nail polish, tips
Minggu, 22 Januari 2012 @ 00.59
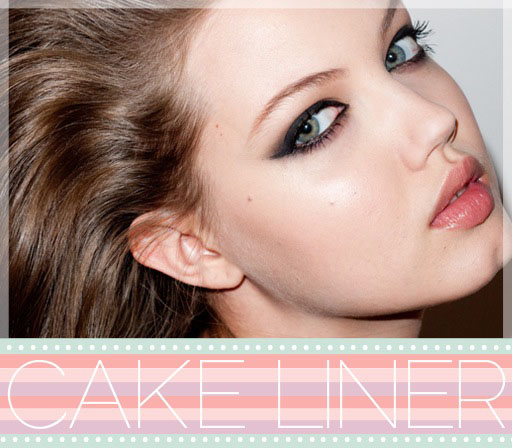
Here’s a big secret for those of you deathly afraid of liquid liner! Cake liner (invented a century ago and used on all the Hollywood icons) is the easiest way to define your eyes… be it winged, cat eye, or simply lining. It’s merely a black matte shadow applied wet with a pointed liner brush. Don’t ask me why it’s called cake liner as you certainly can’t eat it. Anyway, here’s all you need to know:
1. Dip your brush in running water from your sink to wet it then swirl it in circles in the shadow to load it up.
2. Practice drawing lines on the back of your hand by applying more/less pressure to see how it affects the width. {More pressure = wider, less pressure = thinner.}
3. Start at your inner corner and sweep the brush to the outer corner. You can also extend it out for a winged look or out + up for a cat eye. If desired, line your bottom lash line as well.
That’s it! Our favorite is Laura Mercier Tightline Cake Eye Liner because it comes in seven shades.Label: beauty, eyes, liner, tips
Jumat, 02 Desember 2011 @ 06.16
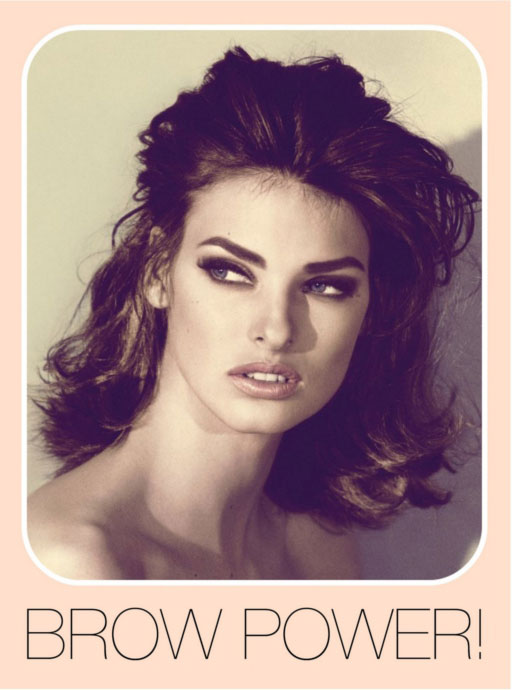
Being a natural strawberry blonde with invisible eyebrows that have no natural arch, I’ve been going a brow specialist for years to shape and tint them and would die without her! I can’t stress enough how important brows are, and if you don’t have someone in your town who only does brows, don’t fret! You can ask your colorist at your favorite hair salon to add a little hair dye on them, or you can try an at-home kit. I saw Sarah Agajanian again last week for my monthly wax, trim + tint and asked her what her top five commandments for brows are to share with our readers. So without further ado, here’s what she so generously shared:
The 5 Eyebrow Commandments:
Eyebrows are the essential frame of the face, these furry arches make or break your look. As an eyebrow sculptor + makeup artist at Damone Roberts Salon Beverly Hills I have acquired my top 5 commandments to perfect arches.
1. The importance of eyebrow gel: Always brush those babies up and out with a clear or colored gel to keep them manicured and out of your eyes. This is a must have. Also, do not fear eyebrow highlight right under your arch that will bring light to your eyes. Try: Damone Roberts Eyebrow Gel.
2. The beginning of your brows should not extend past the indent above your nostril. If your brows are TOO far apart or TOO close together your face will be thrown off balance.
3. Trimming. Little cuticle scissors or my fave Damone Roberts Eyebrow scissors are fabulous to have around. The trick to cutting your brows yourself is to brush the hair up with the direction of the hair growth and then trim the extra hair that passes the eyebrow line. Never brush your brows against the hair growth, you will end up with holes. Try: Damone Roberts Scissors.
4. Color. The color of your brows should compliment your hair color and skin color. You have options. Fill them in with a light shadow or dye them. You can tint your brows lighter or darker. Sometimes my clients feel like they have NO brows, I throw a little bit of tint on them and POW there they are. Just a little bit of tint can go a long way!
5. Stick with what mama gave ya! If you are born with thick beautiful brows, honor that. Shape your brows around the natural shape of your bone structure. Your genes are original and you cannot ever look and be someone else. Aim for your own perfection.
Good luck to you and your brows!Label: beauty, brows, tips
Jumat, 04 November 2011 @ 04.40

Not sure about you guys, but lasers were always a very confusing topic for me. I couldn’t quite understand which ones did what. Like– there’s the one that removes hair, and then there’s one that makes you look like Samantha Jones in that Sex in the City episode. Clearly there’s much more to it. To find out which of these machines are for what, I recently went in and hit up the amazing “Nurse Jill” at Kate Somerville. I knew she would give us the E! True Hollywood Story on lasers. So here we go…
Laser Genesis this is the laser for those of you who want to take baby steps. It’s subtle and gentle, so 3-6 visits are recommended. “Laser G” as Nurse Jill calls it, basically warms up the layers underneath your skin (aka: dermal layers), stimulating new collagen + elastin. It’s non-invasive and you won’t end up with excessive skin irritation or bruising. “This is a favorite amongst those with fine-lines, redness, large pores, uneven skin texture and scars. And let’s just say it’s young Hollywood’s favorite for that red carpet glow, too.”
Limelight this is the laser for those of you with spots. From sun spots to melasma to rosacea, this laser is attracted to pigment. It’s the updated version of IPL or Photofacial. “With the limelight we’re able to treat darker skin tones unlike many other lasers in the past.” It’s very tolerable and over before you know it. You would get this done 3-5 times with 3 weeks in between each visit. Down time means your spots go slightly darker for a couple days, but nothing a little concealer can’t cover. After that you’re better than ever.
Titan this is the laser for those of you who want more firming than a night cream can give you. “A lot of girls are starting this in their early 30′s as a preventative measure. It definitely slows the signs of aging and improves the overall texture of the skin,” explains Nurse Jill. There’s no down time with Titan and it can be used on the face, neck and body. For those of you who already see the fine-lines, wrinkles or loss of elasticity, this is a great non-surgical option for tightening and lifting. Titan is done once a month, 3 months in a row.
Pearl is the bulldozer for your skin. It’s done in 1 or 2 visits and this laser is on a mission to resurface and perfect your face. Bye bye scars, sun damage, and wrinkles. It’s minimally invasive and most people who get this prefer a topical numbing cream prior to the procedure for increase comfort. You can expect a few days of redness and peeling but at the end of those few days, you can expect new, fresh, smooth skin.
VASER Shape … later saddle bags, peace out tummy pooch! Vaser is a brand new body treatment. It’s is a non-invasive, non-surgical laser that combines ultrasound + massage to smooth, firm and shape the body. This lovely laser is used to decrease cellulite and fat as well as tighten and firm the skin. Vaser Shape works with your lymphatic sysytem to flush out fat cells and toxins. A total of five weekly treatments are recommended for best results.
Label: beauty, laser, tips
Sabtu, 24 September 2011 @ 05.03

Happy Saturday, my darlings! Another shift in seasons is upon us. Are you looking forward to it? Leaves, coats, umbrellas + rain! One thing none of us are looking forward to is the dry scalp that often comes with a new season. I’m about to tell you something a little weird, but bear with me… Someone recently came into my studio and asked if I’d heard of Listerine curing dry scalp + flakes. How can you not find that comical?? After a laugh and a weird face, it dawned on me- Listerine is anti-fungal and anti-bacterial and it actually makes sense. Googled it like crazy and found all kinds of people who love this remedy and highly recommend it! Decided to give it a go. Tried it on myself and had one other person try it as well. SHOCKINGLY, it worked.
I mixed
1/2 oz of original formula Listerine1/2 oz of baby oil (to soothe and soften)I shook it up in a bottle and used cotton balls to apply. (Tip your head back a little as you apply to be sure nothing gets on your face.) I left it for 5-10 minutes and then shampooed it out. I only did it for 3 days in a row but I’ve been reading that it can take up to one week. Honestly, not a flake on my scalp. I love that after 15 years of doing hair I can still be baffled by home remedies.
**if you have psoriasis or sensitive skin/scalp, talk to your dermatologist first!Label: beauty, listerine, tips
Jumat, 16 September 2011 @ 05.37

Fall fashion is finally here and as we store away our jean cut-offs and bikinis, we have the chance to change up our makeup a little too. All my life I’ve always passed over lip colors in the brick/brown/rust/pumpkin family because they just didn’t seem pretty to me or like they’d do anything for me or my clients. What a closed mind I had! They don’t just look gorgeous on redheads, they look good on everyone, especially as we lose our summer tans. You just have to broaden your concept as to what you’ve always thought was pretty and give it a try; because it’s a very sophisticated look when you’re ready to see yourself that way.
You can go soft with a rusty nude or caramel or go bold with a deep orange. I would suggest pairing it with a simple eye… a bone or wheat shadow and black mascara complement it beautifully.Label: beauty, fall, make up, tips
Jumat, 09 September 2011 @ 07.54
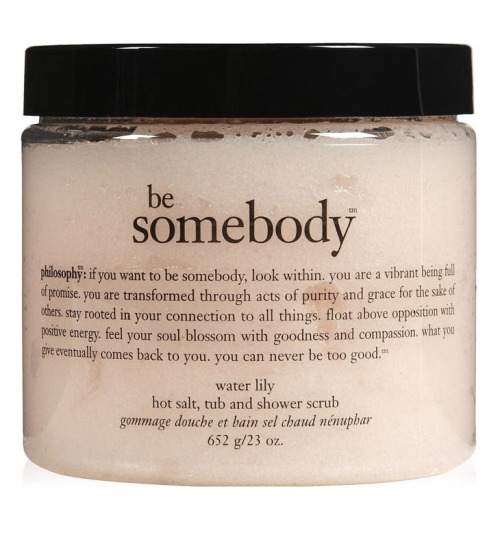 what's lovelier than a good relaxing shower scrub? none<3 this thing keeps your skin healthy and soft. it also mousturize your skin in any way! I love using it so much. but make sure you choose the right shower scrub for your body. so, it'll fit you for sure or else if you choose the wrong shower scrub, you'd surely be in trouble! it affects your skin look. :)so, be careful when it comes to choosing skin products! x what's lovelier than a good relaxing shower scrub? none<3 this thing keeps your skin healthy and soft. it also mousturize your skin in any way! I love using it so much. but make sure you choose the right shower scrub for your body. so, it'll fit you for sure or else if you choose the wrong shower scrub, you'd surely be in trouble! it affects your skin look. :)so, be careful when it comes to choosing skin products! xLabel: beauty, shower scrub, tips
Sabtu, 03 September 2011 @ 08.06
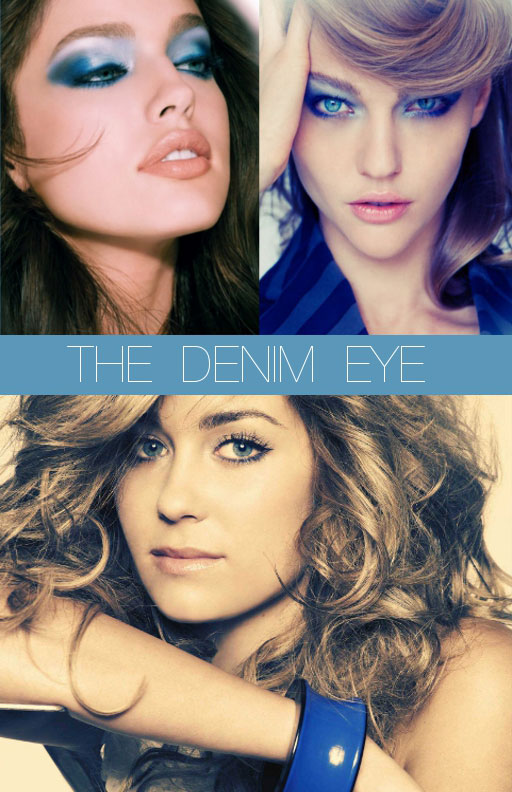
Have you ever wondered why the whole world wears jeans that are blue? Yes sometimes we change it up, but why is blue the standard? I’ve pondered that question many times and have to quess it’s because everything from a pink sweater to a black halter top looks good with blue. It’s just one of those things… and the same theory goes for eye shadow. Blue eye shadow looks good on EVERYONE! Sounds crazy but if you dare to try it, you’ll see it looks gorgeous with brown, blue and green eyes, warm and cool undertones, blondes and brunettes, African American skin to pale ivory skin. Again, it’s just one of those things!
For the faint of heart, try a liner like I did on Lauren Conrad above on my very second job with her back in 2007. You can line both your top and bottom lash lines with an electric or navy-blue kohl or liquid liner, or just line the bottom like we did.
For the more adventurous, try a single wash of blue color across your lid. Then skip liner but really coat your lashes black.
And for the ultra risk-taker, use a light blue shadow on the inner corner, a medium blue shadow on the lid and a bright blue shadow along the outer crease, corner and across the bottom. Line the inner waterline with a black liner and really coat your lashes black.
For all three looks, pair your eyes with one of these monochromatic choices:
Nude blush + nude lipPeach blush + peach lipRosy-pink blush + rosy-pink lip Label: beauty, blush, lips, tips
Kamis, 25 Agustus 2011 @ 06.35
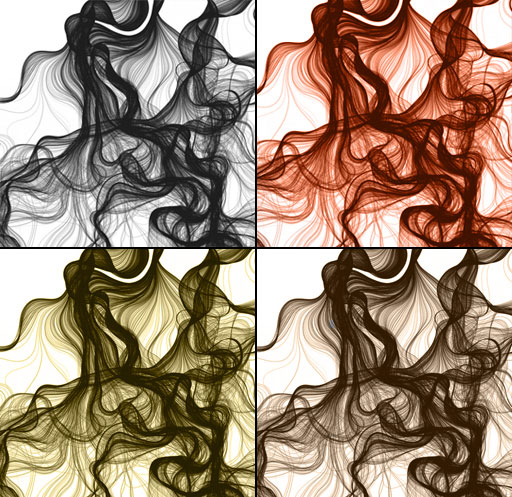
Hair loss is truly upsetting, whether temporary or permanent. Lately we’ve been hearing about hair loss from a lot of our readers. In response, I’m writing this post to address the main causes as well as what can be done temporarily and long term. There are many studies about hair loss and even more opinions. This post comes from first hand experience with my own clients, their loss and their regrowth. This post is not for those experiencing “normal” hair loss. Believe me, you’ll know if you need to read this post!
Lack of nutrition: When the body is lacking required vitamins + minerals, the first thing to reflect that is your hair. Think of it like a flower- the first place you see loss of nutrients in a flower is the petals. Eventually petals will fall off if they’re not given what they need to stay strong. I have seen major fall out from eating disorders, sometimes irreversible damage. I can tell exactly who’s eating and who’s not in my chair because the hair feels unusually brittle prior to falling out. Brittle for no reason. That person can be using the best shampoo + conditioner, getting very little color, and air drying their hair and it will still feel brittle. Typically, image concerns and/or lack of self confidence are at the root of an eating disorder. In the long run, losing your hair only increases those things.
Stress: There are many debates over whether or not stress can cause hair loss. Here’s what I know for sure: a few years ago a friend and I went through horrible relationships at the same time. We both lost a significant amount of hair. Enough that it was visible. We both went into panic mode because the last thing you want to feel at that time is that you’re balding. She stressed about it much longer than I did and my hair had a quicker turn around. According to the Mayo Clinic that’s called “Telogen Effluvium”. With TE “emotional or physical stress pushes a large number of growing hairs into a resting phase. Within a few months, the affected hairs may fall out suddenly when combing or washing.” This simply adds to your stress. You have to get your stress in check. It’s not easy but you must. See a doctor, do yoga, play with a puppy. Whatever helps you. The minute you minimize or eliminate stress is the minute the regrowth process will begin. The sooner, the better. (Silver lining: BOTH of our hair grew back in thicker. YAY!)
Pregnancy: I hate to be the bearer of bad news, but… most of my clients have experienced hair loss with pregnancy. Not all, but most. Usually 3-6 months after the baby is born. Typically, the loss is around the hairline and/or around the nape of the neck. The reason it happens there is because that is a different type of hair. Shockingly we have more than one type of hair on our head. The hair around the hairline and nape of the neck is much more sensitive than the rest. There’s nothing you can do to stop this. The hormonal changes that happen from the start of your pregnancy to months after your baby arrives are so strong that no amount of diet, vitamin, or relaxation is going to stop this very natural process. Sorry to break it to you ladies. Get bangs.
Thyroid: Another hormonal issue: hypo-thyroid. This is a medical issue. You must see a doctor about this. After that, see your dermatologist. The doctor will help get you on the appropriate medication or treatment for your thyroid issue. A dermatologist will help with the hair regrowth. Two very different, but very important roles. I recently read a report that said “Hormonally induced hair loss happens because enzymes start to convert testosterone into DHT (dihydrotestosterone). DHT can attack the hair follicle, shrink it or even make it disappear entirely.” Best to see your doctor and dermatologist before this goes too far.
Alopecia: Alopecia in my opinion is SO random. There is no rhyme or reason to who gets it. I’ve seen it happen with the healthiest of people. It starts with small bald patches that appear for no reason and can spread into larger patches if left untreated. It is said to be caused by heredity. There is also a seperate form called “traction alopecia”. I’ve seen this caused by bad application of extensions. If extensions are applied too tightly or an extension pulls hair too far in the opposite direction of which it grows, it can damage the follicle permanently. Some extensions can also rub and irritate the scalp causing bald patches. Most of the spots I’ve seen over the years have grown hair back once the extension is out or reapplied properly. Always say something if you think an extension feels too tight.
Two interesting facts I found while researching:“Hair cells are some of the fastest growing in the body, and when your body is under stress or in crisis, hair cells can shut down in order to redirect energy elsewhere, to places where it is needed.”“Normally, hair grows about a half inch a month for about three years, and then it goes into a resting period. One in ten hairs is in a resting period at any one time, and after about three months a new hair pushes the old one out. When more hairs go into resting period, or the conversion process speeds up, the balance becomes disrupted, and hair loss occurs.”Temporary fixes:Colored dry shampoo. Spray this on your root + scalp. Not too heavily or you’ll look crazy. Just a light dusting can shadow your scalp making hair instantly appear thicker.Eye shadow. This is a trick I use on set a lot. Hardly anyone has a perfect hair line and in a photoshoot a sparse hair line can be a bother. I use eye shadow in the same shade as the hair and rub it on the scalp with my finger. It makes the area appear more dense and you honestly don’t see it.Extensions are NOT a temporary fix for fall out. You should never put extensions all the way up to the part. You should also never put extensions in weakened hair. If you MUST, use clip-in extensions so you can remove them when you’re at home and let the hair rest.Use a scalp massager, as seen HERE. You can get them online. Try amazon. Brushing weakend hair repeatedly isn’t a good idea. Better to stimulate the scalp directly.Don’t wear tight ponytails. Make sure they’re loose and not adding tension to the scalp. Or wear a messy “Fun Bun“. This sits looser and doesn’t pull downward. It also requires little to no brushing.Long term fixes:
Laser/light therapy. This is done with a brush-looking instrument. They will make small circles on your scalp. It doesn’t hurt at all. It’s slightly expensive, but a good alternative to medication.Nioxin. I’ve seen incredible results in the long run with this system. They now have specific products for women, color treated hair, advanced thinning, etc. See a professional hairstylist to get an opinion on which one you should use.GNC Be Beautiful hair vitamins. I’ve taken these. They’ve worked well for me and for my clients.At the end of the day, topical things can only do so much. Hair grows from the inside out and has to be dealt with accordingly. Work on regulating any stress disorders, significant hormonal changes or medical conditions.My final note on this subject is to get your stress under control and your hormones in check with your doctor. If you experience hair loss, try not to panic. As “holistic” as it may sound, I think the most important thing is to give your hair a safe, stress free place to grow. I hope this info helps you guys experiencing significant hair loss.Label: beauty, hair loss, important, must read, tips
Jumat, 12 Agustus 2011 @ 21.40

good (late) morning fellas! it's almost 12pm here, in my place. well, I'm gonna talk about breakfeast. you know what? breakfeast is so goddamn important for everyone. if you guys are not having your breakfeast because you're on a diet, you're completely wrong. because, it'll make you even fatter than ever. breakfeast gives you many energies to do your activities all day. a glass of plain milk and bread with nutella would make a good breakfeast for you before going to school. or, eggs & bacon, noodles, spagheti will do. for fellas who have work, you could have something heavy for breakfeast because you have so much to do in a day. so, if you want to skip breakfeast, better don't. you better skip dinner :)or, eat dinner before 7pm. that'll make your weight loss a bit. xLabel: breakfeast, personal, tips
@ 21.29
 Alright, so looking at hair under a microscope is always a little bit creepy + gross. I’m only showing you this with the hopes that it might change the way you treat your hair. Once you know the cause of damage, it’s easier to prevent it, right? Here’s the long and the short of it: Alright, so looking at hair under a microscope is always a little bit creepy + gross. I’m only showing you this with the hopes that it might change the way you treat your hair. Once you know the cause of damage, it’s easier to prevent it, right? Here’s the long and the short of it:
a. This is a close look at healthy hair. The cuticle (the outer layer) lays smooth. All of it’s “scales” are lined up and flat, one on top of the other. Flat cuticles = smooth surface. Smooth surface = light reflection. Light reflection = more SHINE!
b. This is a slightly raised cuticle. I would say this is what the average person’s hair looks like if they use a blow dryer. The other cause of slightly raised cuticle can be towel drying. It’s okay to towel dry it but don’t rough it up. Work your way down the hair. Or gently scrunch it if you’re going for waves. As I mentioned in a previous post, t-shirt drying is much safer than towel drying and it helps to eliminate frizz big time.
c. This is an extremely raised cuticle. Main causes are bleaching, over-processing with color, over-styling with heat, using too many alcohol based products in conjunction with heat styling, shampooing and not conditioning, etc… This is bad news. When your cuticle looks like this your hair will appear dull, and lifeless. It can’t reflect shine when the surface is broken up this way. Hair Bootcamp is a must for this hair. (Which just so happens to be one of my posts for next week!) If you don’t change your routine, you’ll be looking at breakage very soon.
d. Here we have a piece of hair that WILL eventually break off. This was most likely caused by harsh detangling. Never rush through a knot. Take your time and comb it out slowly. I also recommend getting knots out with a brush instead of a comb. Sometimes the single row of teeth on a comb can actually tighten the knot. I always work knots out slowly with a brush. Another may-jor cause of this is yanking out a ponytail holder. Stop yourself and work the tangle around the ponytail holder out slowly. Sadly, once this has happened in the middle of a piece of hair, it’s definitely coming off. Collect a bunch of these and you’ve got yourself a nice case of the fly-aways! Booooo.
e. Well hello split-end. This is the enemy!! I’m actually really happy that you guys are seeing this because just knowing what split ends looks like will help you understand how they get stuck on each other. They’re like claws that can grab onto one another causing tangles. Tangled ends cause even further damage. It’s important to get them off regularly.
f. This is knotted hair. If not properly and carefully brushed out, a knot will lead to “example d.” If you gently brush it out, you can avoid that. (Also, this is just a really cool look at knotted hair!)
g. This is a shattered hair shaft. This can be caused by a bad application or rough removal of extensions. Another cause could be a bad perm (solution, the way it’s wrapped and how it’s processed). Not sure too many of you are getting perms, but if you are, please be sure to visit someone who specializes in that. Not just someone who will say yes because they want to make the money from the service. If you have extensions, make sure the person doing them is gentle, takes their time and isn’t too aggressive with your delicate hair!
Whatever kind of hair you have, you’re now one big step closer to “example a.” above. We’ve got to be good to our hair! Learn it + love it. xLabel: beauty, hair, must read, tips
Jumat, 05 Agustus 2011 @ 21.35

Fasten your seat belts ladies! I have spent a lot of time traveling in the last couple months which can really take a toll on your appearance. So I thought I would share a couple of helpful beauty tips that I have picked up along the way.
- Moisturize! I can’t stress this one enough. The recycled air in the plane can really dry out your pretty skin. The night before you are headed to the airport be sure to use a good moisturizer and lots of it. Also don’t forget to include both a travel sized face and lip moisturizer in your carry-on luggage to use during the flight.
- It’s time to “takeoff”… your makeup! If you are like me and dread the thought of strolling though the airport bare faced, then pack some makeup removing wipes in your bag. Then, once you have boarded the plane, remove your makeup and apply a layer of moisturizer.
- Avoid carbonation and salty foods. I know this one is a challenge considering the first things to be served on a plane are salted nuts and soda, but stay strong ladies! Instead opt for some herbal tea or good old H2O. Also try packing your own snacks. Things like unsalted nuts or dried fruit make an excellent in-flight treat and won’t leave you puffy or bloated. It is also smart to avoid alcohol (sorry!) because it is more likely to make you dehydrated.
- Some of you might experience swelling in your hands and feet while flying. One way to avoid this is by wearing compression socks. They aren’t the most fashionable items, but they keep your tootsies from swelling up during the flight.
- Freshen up! Most perfume bottles exceed the limit of liquid ounces allowed through security and have to travel in our checked luggage, but no one wants to arrive at their final destination smelling like a 747. Next time you fly pack a couple of perfume samples with you. They work just as well and won’t be confiscated in security.
Label: beauty, flight, tips
Sabtu, 23 Juli 2011 @ 02.31
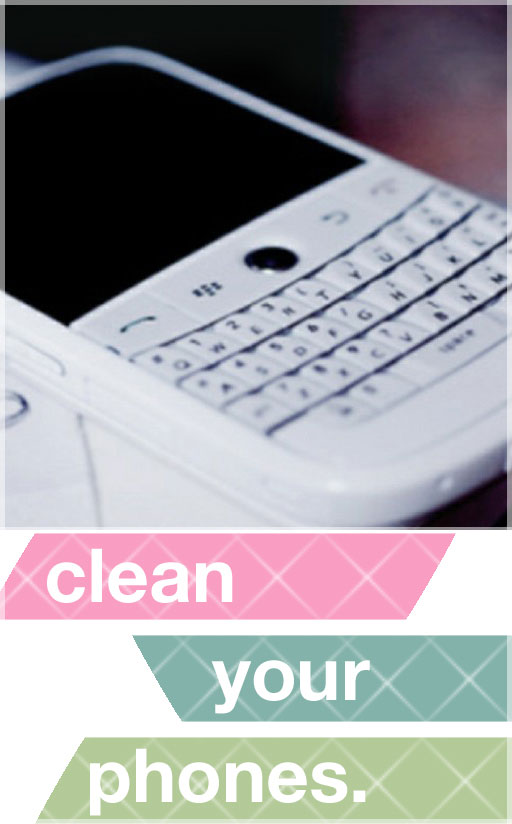
Dear everyone,It’s the weekend. We hope you’re going to be doing something fun and exciting. Know what’s not fun and exciting? The fact that bacteria collects on the surface of your phone while in your purse. That bacteria makes it’s way to your face and causes blackheads, blemishes + sometimes full breakouts. It’s like rubbing your face in the bottom of your handbag! Ew. Interestingly, skin care experts + dermatologists can usually tell which side you use most when talking on the phone. Take a quick minute to wipe it down with a dab rubbing alcohol on a cloth! It will kill the bacteria and save you a lot of time in the long run!xxLabel: phones, tips
Selasa, 12 Juli 2011 @ 00.40

these are the things I love to do at summer ;)- go for a bike ride
- laugh so hard that I cry
- have a movie night with girlfriends
- go for a swim in the ocean and then air dry in the sun
- order dessert and eat the whole thing
- paint a room a new random color
- make a bubble bath and stay in it until all the bubbles are gone
- research amazing vacation destinations, even if I’m not going to go
- break open lavender + gardenias
- putting peonies all over my house for the 2.5 months they’re in season
- read a book on a hammock
- run through sprinklers
- sit outside at dusk and watch lightning bugs
- make popcorn and watch Gone with the Wind
you should go try it to! have a good summer fellas <3 Label: summer, tips
Kamis, 07 Juli 2011 @ 06.22
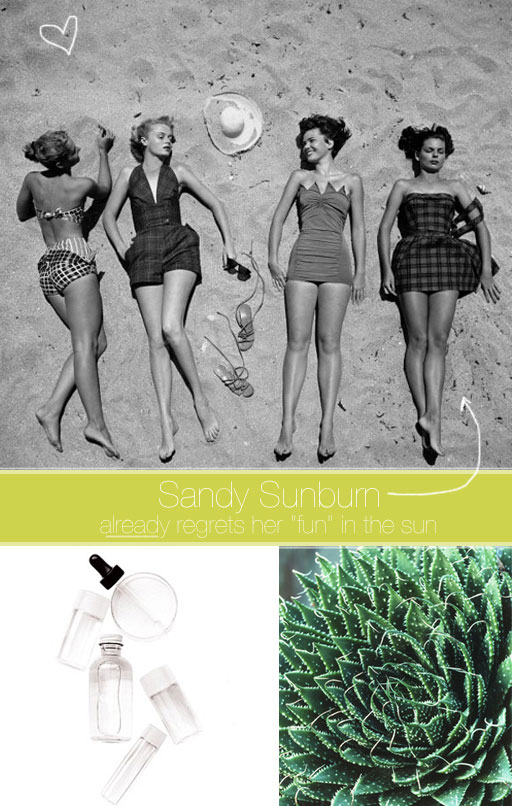
I hope that everyone had a fun and safe holiday weekend! And if your weekend was anything like mine, then you spent plenty of time in the sunshine. While those early summer days are oh-so-enjoyable, they can sometime leave you with an unwanted souvenir… a sunburn! I was able to avoid the burn this time around (mostly because the majority of my time was spent hiding under a giant floppy hat + umbrella while reapplying sunscreen hourly), but for the less protected, I’ve provided some suggestions for after the damage has been done:
Here are a few tips on how to deal with those less than desirable sunburns…
- Take Vitamin E to reduce inflammation from your sunburn. Drink lots of water to stay hydrated.
- Eat foods high in vitamin c (citrus fruits, strawberries, spinach), beta-carotene (chili peppers, kale, carrots), vitamin E (nuts, olives) or flax seed oil. Sliced cucumbers or cold wet tea bags help soothe and extract the sting
- Take a cool shower.
- Avoid using any harsh soaps + perfumes on sunburned area.
- Keep skin moisturized. Try using a lotion with shea butter or palm oils for extra moisture.
Here are my favorite “Kitchen Beautician” remedies for a mild sunburn…
- Mix lavender oil and water together in a small spray bottle and keep it in your refrigerator. Mist your skin throughout the day to soothe the burn.
- Aloe vera can relive the pain of a sunburn. Try filling an ice tray with aloe vera and freezing it. Rub the frozen cubes onto the burn area.
- Mix baking soda into your bath and soak for about 15 minutes. Let skin air dry instead of drying off with a towel.
- Witch hazel has been known to reduce inflammation. It can be applied to a burn with a cotton ball or added to a bath.
Label: beauty, style, sunburn, tips
|
Senin, 09 Juli 2012 @ 06.34
This might seem pretty obvious to some people, but you’d be surprised at how many lovely ladies don’t clean out their hair brushes. Too often I walk into a friend’s bathroom, see a brush full of hair and I can’t help myself, so I clean it out. Within the next couple days I usually hear about how much it changed the way their hair looks. It may not seem like a big deal but hair brushes are total traps! Dust, conditioner, oil, germs, even dust mites can be in your dirty hair brush, which is DISGUSTING. For example: if you wash, brush and blowdry your hair on a Monday and then “re-finish” it on Tuesday with the same brush, the oils and dirt from all day Monday will be sitting in that brush. Pile those up for a couple weeks, months… years? Ew. Personally, I recommend you clean out your brush once every week or two. It takes a couple minutes! It’s not something we really think about but you should try to become conscious of the hair piling up in your brush. Cleaning out your round brushes will allow you to get SO much more tension which will lead to smoothness and shine. Here’s how I like to clean out my brushes at home:
- Grab any brush that’s gathered a visible amount of hair. Here I’m showing you how to clean out a flat (paddle) brush but this can be done exactly the same on a round brush.
- In the hair world, we have tools to clean out brushes, but when I’m at home I grab a pen or pencil and slide it under the hair in the brush. Now pull up until the hair starts to loosen. (You do this so you don’t end up cutting your bristles with the next step!)
- Next, go in with your scissors and cut straight down the middle as seen above. TIP: If you’re cleaning out a round brush, flip it over and do the same on the opposite side.
- Now “peel” the hair open and remove. You can go back in with your pen or pencil to loosen up any more tight spots.
- Discard that gorgeous hairball.
- I like to shampoo my brushes each time I clean out the hair. To do that, just fill up the sink with warm water and add a tablespoon of cleansing/clarifying shampoo. Wash the brush + bristles thoroughly, rinse well, and let it dry (or blow it dry).
Label: beauty, brushes, clean, cleaning, diy, hair, pretty, tips
Jumat, 15 Juni 2012 @ 00.29
Don’t you just want to cry when you drop your brand new compact and the powder shatters into a million little pieces? But wait! Don’t throw it out and call your losses. You can absolutely put humpty dumpty back together again! And while you’re at it, grab your old cream shadow, blush or liner that has dried out, cracked or shrunk and bring it back to life too. Here’s how to do both:
POWER TOOLS: 70% alcohol {it works 1000 times better for this than your typical rubbing alcohol from the drug store and can be purchased at your local art supply}, plastic wrap, spatula, dropper, synthetic eyeliner brush {I used this favorite go-to liner brush for its round edges and stiff short bristles}, Q-tip {optional if you’re a perfectionist… you know who you are!}
WRAP IT UP: Completely cover the compact with the plastic wrap and make sure it adheres tightly to contain everything.
MASH IT UP: With your spatula, crush up the entire pan of shadow, not just the broken pieces. You essentially are turning the pressed powder back into loose powder.
ADD ALCOHOL: Remove the wrap and add at least 10 droppers full of alcohol. You can add a few droppers full at a time to see how much you need. I used a dozen.
SMOOTH IT OVER: Now you’ll feel the powder has become sponge-like and very pliable, giving you the perfect opportunity to even it out smoothly with your spatula.
PERFECT THE EDGES: Use your eyeliner brush to smooth it out even further. Give it a few hours to completely dry and it’s like it never happened! To make it extra pretty, clean up the perimeter with a Q-tip
.
To revive your dried-out and cracked old cream shadow, apply the same steps except there’s no need to wrap it up or mash it up. Just add alcohol to reactivate it, stir it, smooth it out and perfect the edges. If you’re like us, you hate waste and these are two great ways to save and use what you have!
Label: alcohol, beauty, diy, girls talk, important, make up, must read, products, tips
Minggu, 10 Juni 2012 @ 07.41
IT'S JUNE! SUMMERTIME :D
I know, I haven't been posting a new post since ever. I'm very busy with my school thingy. Projects, exams, homeworks, etc. I don't have any time to open up the computer even surf the internet. so yeah.. it's a spare time for me now to post something here.. :) now that it's June, it's summertime for me here in Indonesia. this year's summer, I'm going to Bali with my family. I can't wait to get in the beach and get tan. :D I haven't packed yet though, it's still 2 weeks to go. but there's some things I couldn't forget to bring to Bali. here they are...
- Sun screen
- Bikinis
- Flip flops
- Hat
- Sunglasses
- A bottle of water
I'm really excited for this year's summer. I hope it's as awesome as last year.. oh well. I will not be posting much anymore in this blog. I hope y'all can enjoy my entries here. xoxo
Label: bali, beauty, bikini, june, summer, tan, tips
Rabu, 18 April 2012 @ 20.26
hey everyone.. here's some tips for your beauty skin, face, and body. enjoy :)
- Tea Tree Oil mixed with Vitamin E supplements is an excellent healing agent. It heals blemishes but also cures scar tissues
- Applying lotion right after you step out of the shower seals in the moisture that your skin has just absorbed.
- Be kind to your skin. Stop using such strong scented soaps, instead use mild unperfumed cleansers.
- For oily skin use some plain Milk of Magnesia, rub it on & let dry, then rinse with lukewarm water. It absorbs oil wonderfully
- Avocados contain healthy fats and vitamins C and E to keep skin plump, bright, and hydrated.
- Long, steamy showers can lead to dry, scaly skin. Opt for lukewarm temps instead to glow from head to toe.
- Alcohol zaps the body of vitamin A, an important antioxidant that is necessary for repairing skin tissue
- Lemon juice is a citric acid which is a part of AHAs group which is an effective home remedy for reducing acne scars.
- Steam your face over a bowl of hot water, cleanse with your usual face wash, & splash with cool water to tighten your clean face
- As an alternative to the usual glass of water, try coconut water. Helps hydrates the skin, helps with weight loss, & treats acne
- Watermelon & cucumbers are loaded with water, so naturally, eating them keeps you & your skin hydrated.
- Add a few cups of milk to your next bath to take advantage of its lactic acid, a natural skin-softener.
- Bananas are full of vitamins & minerals that are good for your face as well as your body.
- Stay away from caffeine. Acne outbreaks are tied to both increased stress levels and sleep deprivation, lower your caffeine intake.
- Strawberries help to tone the skin, lighten any pigmentation problems and keeps the skin smooth and supple.
- Apply thin layer of plain yogurt to freshly cleansed face, throat, & chest, lie down. Rest for 10-20 minutes. Rinse with cool water.
- An apple a day is one of the most delicious prescriptions ever made. Apples are a powerful source of antioxidants.
- Coffee seeds & milk powder: Both in equal quantity & mix with rose water to make paste.Leave it on face for 15mins, rinse.
- Moisturizers work well to treat dry skin. Choose a moisturizer that is hypoallergenic (it should say so on the label)
- The Top two beauty secrets are applying lotion everyday to keep your skin from drying out & becoming wrinkled & Drinking water!
- The most important thing to do if you suffer from Acne is to drink at least four pints of water every day
- By going to bed a little earlier and fighting stress with exercise, you’ll begin to see an improvement in your complexion.
- After showering, moisturize your whole body with lotion! Your body will thank you.
- Great cleanser for acne. Mix fresh lemon juice with rosewater apply to affected skin for 30mins then wash with cold-water
- Using relaxation techniques like yoga, meditation, and massage therapy can be very helpful in getting rid of wrinkles on the face
and the last.. aim for total wellness. Avoid stress, get 7 hours sleep nightly, avoid polluted areas, exercise daily and maintain a good healthy diet. Label: beauty, body, face, skinny, tips
@ 20.09
So annoying– You finish your mani, it looks amazing and then a short time later you look down to see bubbles in your polish. Here are some ways to avoid that problem:
- Don’t shake your polish bottle. Try rolling it between the palms of your hands instead. Shaking the polish vigorously creates a bazillion little bubbles that you can’t see… until they rise! If you absolutely have to shake the bottle to mix your color, do so and then wait about half an hour so all the bubbles can surface before you start your mani.
- Avoid thick polish. The thicker the polish, the longer bubbles will take to surface. A new bottle of polish is thinner and the bubbles rise quicker. You can add a couple drops of polish remover to thin out thick polish, but just remember that adding acetone/remover weakens the bond between the polish and your nail. AKA: it will probably start to chip sooner.
- Keep the lids on your polish. Sometimes we forget to screw the lids down while doing nail art or cleaning up the cuticles. The longer you leave the lid off, the more air gets in and the more the polish will thicken and thick polish is a bubble trap!
- Use a base coat. I don’t think I’ve ever seen bubbles in a base coat. Have you? Laying a proper foundation for your polish is a must when trying to avoid bubbles.
- Do your nails in a cool, dry place. If you’re body temp is up, heat will radiate and can actually cause polish bubbles. If temperatures are high where you are, try using a small fan to dry/cool your nails right after polish is applied. Soaking or running your hands in cold water and then drying them before you start painting can also help if it’s hot out.
- Let the first coat dry completely. I’ve noticed that with some polishes, you have to let the first coat fully dry before applying the second coat to avoid bubbles. If you don’t have time to let the first coat dry entirely, at least make sure you’re using a polish with a “quick dry” label.
- Lift the brush as little as possible. On your first coat, try doing long strokes instead of short quick strokes with the brush. I find that the quicker shorter strokes will push air into the polish. If you need to do short quick strokes to get to a certain spot, do it on the second round after the first coat dries all the way.
Label: girls talk, nail polish, tips
Minggu, 22 Januari 2012 @ 00.59
Here’s a big secret for those of you deathly afraid of liquid liner! Cake liner (invented a century ago and used on all the Hollywood icons) is the easiest way to define your eyes… be it winged, cat eye, or simply lining. It’s merely a black matte shadow applied wet with a pointed liner brush. Don’t ask me why it’s called cake liner as you certainly can’t eat it. Anyway, here’s all you need to know:
1. Dip your brush in running water from your sink to wet it then swirl it in circles in the shadow to load it up.
2. Practice drawing lines on the back of your hand by applying more/less pressure to see how it affects the width. {More pressure = wider, less pressure = thinner.}
3. Start at your inner corner and sweep the brush to the outer corner. You can also extend it out for a winged look or out + up for a cat eye. If desired, line your bottom lash line as well.
That’s it! Our favorite is Laura Mercier Tightline Cake Eye Liner because it comes in seven shades.Label: beauty, eyes, liner, tips
Jumat, 02 Desember 2011 @ 06.16
Being a natural strawberry blonde with invisible eyebrows that have no natural arch, I’ve been going a brow specialist for years to shape and tint them and would die without her! I can’t stress enough how important brows are, and if you don’t have someone in your town who only does brows, don’t fret! You can ask your colorist at your favorite hair salon to add a little hair dye on them, or you can try an at-home kit. I saw Sarah Agajanian again last week for my monthly wax, trim + tint and asked her what her top five commandments for brows are to share with our readers. So without further ado, here’s what she so generously shared:
The 5 Eyebrow Commandments:
Eyebrows are the essential frame of the face, these furry arches make or break your look. As an eyebrow sculptor + makeup artist at Damone Roberts Salon Beverly Hills I have acquired my top 5 commandments to perfect arches.
1. The importance of eyebrow gel: Always brush those babies up and out with a clear or colored gel to keep them manicured and out of your eyes. This is a must have. Also, do not fear eyebrow highlight right under your arch that will bring light to your eyes. Try: Damone Roberts Eyebrow Gel.
2. The beginning of your brows should not extend past the indent above your nostril. If your brows are TOO far apart or TOO close together your face will be thrown off balance.
3. Trimming. Little cuticle scissors or my fave Damone Roberts Eyebrow scissors are fabulous to have around. The trick to cutting your brows yourself is to brush the hair up with the direction of the hair growth and then trim the extra hair that passes the eyebrow line. Never brush your brows against the hair growth, you will end up with holes. Try: Damone Roberts Scissors.
4. Color. The color of your brows should compliment your hair color and skin color. You have options. Fill them in with a light shadow or dye them. You can tint your brows lighter or darker. Sometimes my clients feel like they have NO brows, I throw a little bit of tint on them and POW there they are. Just a little bit of tint can go a long way!
5. Stick with what mama gave ya! If you are born with thick beautiful brows, honor that. Shape your brows around the natural shape of your bone structure. Your genes are original and you cannot ever look and be someone else. Aim for your own perfection.
Good luck to you and your brows!Label: beauty, brows, tips
Jumat, 04 November 2011 @ 04.40
Not sure about you guys, but lasers were always a very confusing topic for me. I couldn’t quite understand which ones did what. Like– there’s the one that removes hair, and then there’s one that makes you look like Samantha Jones in that Sex in the City episode. Clearly there’s much more to it. To find out which of these machines are for what, I recently went in and hit up the amazing “Nurse Jill” at Kate Somerville. I knew she would give us the E! True Hollywood Story on lasers. So here we go…
Laser Genesis this is the laser for those of you who want to take baby steps. It’s subtle and gentle, so 3-6 visits are recommended. “Laser G” as Nurse Jill calls it, basically warms up the layers underneath your skin (aka: dermal layers), stimulating new collagen + elastin. It’s non-invasive and you won’t end up with excessive skin irritation or bruising. “This is a favorite amongst those with fine-lines, redness, large pores, uneven skin texture and scars. And let’s just say it’s young Hollywood’s favorite for that red carpet glow, too.”
Limelight this is the laser for those of you with spots. From sun spots to melasma to rosacea, this laser is attracted to pigment. It’s the updated version of IPL or Photofacial. “With the limelight we’re able to treat darker skin tones unlike many other lasers in the past.” It’s very tolerable and over before you know it. You would get this done 3-5 times with 3 weeks in between each visit. Down time means your spots go slightly darker for a couple days, but nothing a little concealer can’t cover. After that you’re better than ever.
Titan this is the laser for those of you who want more firming than a night cream can give you. “A lot of girls are starting this in their early 30′s as a preventative measure. It definitely slows the signs of aging and improves the overall texture of the skin,” explains Nurse Jill. There’s no down time with Titan and it can be used on the face, neck and body. For those of you who already see the fine-lines, wrinkles or loss of elasticity, this is a great non-surgical option for tightening and lifting. Titan is done once a month, 3 months in a row.
Pearl is the bulldozer for your skin. It’s done in 1 or 2 visits and this laser is on a mission to resurface and perfect your face. Bye bye scars, sun damage, and wrinkles. It’s minimally invasive and most people who get this prefer a topical numbing cream prior to the procedure for increase comfort. You can expect a few days of redness and peeling but at the end of those few days, you can expect new, fresh, smooth skin.
VASER Shape … later saddle bags, peace out tummy pooch! Vaser is a brand new body treatment. It’s is a non-invasive, non-surgical laser that combines ultrasound + massage to smooth, firm and shape the body. This lovely laser is used to decrease cellulite and fat as well as tighten and firm the skin. Vaser Shape works with your lymphatic sysytem to flush out fat cells and toxins. A total of five weekly treatments are recommended for best results.
Label: beauty, laser, tips
Sabtu, 24 September 2011 @ 05.03
Happy Saturday, my darlings! Another shift in seasons is upon us. Are you looking forward to it? Leaves, coats, umbrellas + rain! One thing none of us are looking forward to is the dry scalp that often comes with a new season. I’m about to tell you something a little weird, but bear with me… Someone recently came into my studio and asked if I’d heard of Listerine curing dry scalp + flakes. How can you not find that comical?? After a laugh and a weird face, it dawned on me- Listerine is anti-fungal and anti-bacterial and it actually makes sense. Googled it like crazy and found all kinds of people who love this remedy and highly recommend it! Decided to give it a go. Tried it on myself and had one other person try it as well. SHOCKINGLY, it worked.
I mixed
1/2 oz of original formula Listerine1/2 oz of baby oil (to soothe and soften)I shook it up in a bottle and used cotton balls to apply. (Tip your head back a little as you apply to be sure nothing gets on your face.) I left it for 5-10 minutes and then shampooed it out. I only did it for 3 days in a row but I’ve been reading that it can take up to one week. Honestly, not a flake on my scalp. I love that after 15 years of doing hair I can still be baffled by home remedies.
**if you have psoriasis or sensitive skin/scalp, talk to your dermatologist first!Label: beauty, listerine, tips
Jumat, 16 September 2011 @ 05.37
Fall fashion is finally here and as we store away our jean cut-offs and bikinis, we have the chance to change up our makeup a little too. All my life I’ve always passed over lip colors in the brick/brown/rust/pumpkin family because they just didn’t seem pretty to me or like they’d do anything for me or my clients. What a closed mind I had! They don’t just look gorgeous on redheads, they look good on everyone, especially as we lose our summer tans. You just have to broaden your concept as to what you’ve always thought was pretty and give it a try; because it’s a very sophisticated look when you’re ready to see yourself that way.
You can go soft with a rusty nude or caramel or go bold with a deep orange. I would suggest pairing it with a simple eye… a bone or wheat shadow and black mascara complement it beautifully.Label: beauty, fall, make up, tips
Jumat, 09 September 2011 @ 07.54
what's lovelier than a good relaxing shower scrub? none<3 this thing keeps your skin healthy and soft. it also mousturize your skin in any way! I love using it so much. but make sure you choose the right shower scrub for your body. so, it'll fit you for sure or else if you choose the wrong shower scrub, you'd surely be in trouble! it affects your skin look. :)so, be careful when it comes to choosing skin products! xLabel: beauty, shower scrub, tips
Sabtu, 03 September 2011 @ 08.06
Have you ever wondered why the whole world wears jeans that are blue? Yes sometimes we change it up, but why is blue the standard? I’ve pondered that question many times and have to quess it’s because everything from a pink sweater to a black halter top looks good with blue. It’s just one of those things… and the same theory goes for eye shadow. Blue eye shadow looks good on EVERYONE! Sounds crazy but if you dare to try it, you’ll see it looks gorgeous with brown, blue and green eyes, warm and cool undertones, blondes and brunettes, African American skin to pale ivory skin. Again, it’s just one of those things!
For the faint of heart, try a liner like I did on Lauren Conrad above on my very second job with her back in 2007. You can line both your top and bottom lash lines with an electric or navy-blue kohl or liquid liner, or just line the bottom like we did.
For the more adventurous, try a single wash of blue color across your lid. Then skip liner but really coat your lashes black.
And for the ultra risk-taker, use a light blue shadow on the inner corner, a medium blue shadow on the lid and a bright blue shadow along the outer crease, corner and across the bottom. Line the inner waterline with a black liner and really coat your lashes black.
For all three looks, pair your eyes with one of these monochromatic choices:
Nude blush + nude lipPeach blush + peach lipRosy-pink blush + rosy-pink lip Label: beauty, blush, lips, tips
Kamis, 25 Agustus 2011 @ 06.35
Hair loss is truly upsetting, whether temporary or permanent. Lately we’ve been hearing about hair loss from a lot of our readers. In response, I’m writing this post to address the main causes as well as what can be done temporarily and long term. There are many studies about hair loss and even more opinions. This post comes from first hand experience with my own clients, their loss and their regrowth. This post is not for those experiencing “normal” hair loss. Believe me, you’ll know if you need to read this post!
Lack of nutrition: When the body is lacking required vitamins + minerals, the first thing to reflect that is your hair. Think of it like a flower- the first place you see loss of nutrients in a flower is the petals. Eventually petals will fall off if they’re not given what they need to stay strong. I have seen major fall out from eating disorders, sometimes irreversible damage. I can tell exactly who’s eating and who’s not in my chair because the hair feels unusually brittle prior to falling out. Brittle for no reason. That person can be using the best shampoo + conditioner, getting very little color, and air drying their hair and it will still feel brittle. Typically, image concerns and/or lack of self confidence are at the root of an eating disorder. In the long run, losing your hair only increases those things.
Stress: There are many debates over whether or not stress can cause hair loss. Here’s what I know for sure: a few years ago a friend and I went through horrible relationships at the same time. We both lost a significant amount of hair. Enough that it was visible. We both went into panic mode because the last thing you want to feel at that time is that you’re balding. She stressed about it much longer than I did and my hair had a quicker turn around. According to the Mayo Clinic that’s called “Telogen Effluvium”. With TE “emotional or physical stress pushes a large number of growing hairs into a resting phase. Within a few months, the affected hairs may fall out suddenly when combing or washing.” This simply adds to your stress. You have to get your stress in check. It’s not easy but you must. See a doctor, do yoga, play with a puppy. Whatever helps you. The minute you minimize or eliminate stress is the minute the regrowth process will begin. The sooner, the better. (Silver lining: BOTH of our hair grew back in thicker. YAY!)
Pregnancy: I hate to be the bearer of bad news, but… most of my clients have experienced hair loss with pregnancy. Not all, but most. Usually 3-6 months after the baby is born. Typically, the loss is around the hairline and/or around the nape of the neck. The reason it happens there is because that is a different type of hair. Shockingly we have more than one type of hair on our head. The hair around the hairline and nape of the neck is much more sensitive than the rest. There’s nothing you can do to stop this. The hormonal changes that happen from the start of your pregnancy to months after your baby arrives are so strong that no amount of diet, vitamin, or relaxation is going to stop this very natural process. Sorry to break it to you ladies. Get bangs.
Thyroid: Another hormonal issue: hypo-thyroid. This is a medical issue. You must see a doctor about this. After that, see your dermatologist. The doctor will help get you on the appropriate medication or treatment for your thyroid issue. A dermatologist will help with the hair regrowth. Two very different, but very important roles. I recently read a report that said “Hormonally induced hair loss happens because enzymes start to convert testosterone into DHT (dihydrotestosterone). DHT can attack the hair follicle, shrink it or even make it disappear entirely.” Best to see your doctor and dermatologist before this goes too far.
Alopecia: Alopecia in my opinion is SO random. There is no rhyme or reason to who gets it. I’ve seen it happen with the healthiest of people. It starts with small bald patches that appear for no reason and can spread into larger patches if left untreated. It is said to be caused by heredity. There is also a seperate form called “traction alopecia”. I’ve seen this caused by bad application of extensions. If extensions are applied too tightly or an extension pulls hair too far in the opposite direction of which it grows, it can damage the follicle permanently. Some extensions can also rub and irritate the scalp causing bald patches. Most of the spots I’ve seen over the years have grown hair back once the extension is out or reapplied properly. Always say something if you think an extension feels too tight.
Two interesting facts I found while researching:“Hair cells are some of the fastest growing in the body, and when your body is under stress or in crisis, hair cells can shut down in order to redirect energy elsewhere, to places where it is needed.”“Normally, hair grows about a half inch a month for about three years, and then it goes into a resting period. One in ten hairs is in a resting period at any one time, and after about three months a new hair pushes the old one out. When more hairs go into resting period, or the conversion process speeds up, the balance becomes disrupted, and hair loss occurs.”Temporary fixes:Colored dry shampoo. Spray this on your root + scalp. Not too heavily or you’ll look crazy. Just a light dusting can shadow your scalp making hair instantly appear thicker.Eye shadow. This is a trick I use on set a lot. Hardly anyone has a perfect hair line and in a photoshoot a sparse hair line can be a bother. I use eye shadow in the same shade as the hair and rub it on the scalp with my finger. It makes the area appear more dense and you honestly don’t see it.Extensions are NOT a temporary fix for fall out. You should never put extensions all the way up to the part. You should also never put extensions in weakened hair. If you MUST, use clip-in extensions so you can remove them when you’re at home and let the hair rest.Use a scalp massager, as seen HERE. You can get them online. Try amazon. Brushing weakend hair repeatedly isn’t a good idea. Better to stimulate the scalp directly.Don’t wear tight ponytails. Make sure they’re loose and not adding tension to the scalp. Or wear a messy “Fun Bun“. This sits looser and doesn’t pull downward. It also requires little to no brushing.Long term fixes:
Laser/light therapy. This is done with a brush-looking instrument. They will make small circles on your scalp. It doesn’t hurt at all. It’s slightly expensive, but a good alternative to medication.Nioxin. I’ve seen incredible results in the long run with this system. They now have specific products for women, color treated hair, advanced thinning, etc. See a professional hairstylist to get an opinion on which one you should use.GNC Be Beautiful hair vitamins. I’ve taken these. They’ve worked well for me and for my clients.At the end of the day, topical things can only do so much. Hair grows from the inside out and has to be dealt with accordingly. Work on regulating any stress disorders, significant hormonal changes or medical conditions.My final note on this subject is to get your stress under control and your hormones in check with your doctor. If you experience hair loss, try not to panic. As “holistic” as it may sound, I think the most important thing is to give your hair a safe, stress free place to grow. I hope this info helps you guys experiencing significant hair loss.Label: beauty, hair loss, important, must read, tips
Jumat, 12 Agustus 2011 @ 21.40
good (late) morning fellas! it's almost 12pm here, in my place. well, I'm gonna talk about breakfeast. you know what? breakfeast is so goddamn important for everyone. if you guys are not having your breakfeast because you're on a diet, you're completely wrong. because, it'll make you even fatter than ever. breakfeast gives you many energies to do your activities all day. a glass of plain milk and bread with nutella would make a good breakfeast for you before going to school. or, eggs & bacon, noodles, spagheti will do. for fellas who have work, you could have something heavy for breakfeast because you have so much to do in a day. so, if you want to skip breakfeast, better don't. you better skip dinner :)or, eat dinner before 7pm. that'll make your weight loss a bit. xLabel: breakfeast, personal, tips
@ 21.29
Alright, so looking at hair under a microscope is always a little bit creepy + gross. I’m only showing you this with the hopes that it might change the way you treat your hair. Once you know the cause of damage, it’s easier to prevent it, right? Here’s the long and the short of it:
a. This is a close look at healthy hair. The cuticle (the outer layer) lays smooth. All of it’s “scales” are lined up and flat, one on top of the other. Flat cuticles = smooth surface. Smooth surface = light reflection. Light reflection = more SHINE!
b. This is a slightly raised cuticle. I would say this is what the average person’s hair looks like if they use a blow dryer. The other cause of slightly raised cuticle can be towel drying. It’s okay to towel dry it but don’t rough it up. Work your way down the hair. Or gently scrunch it if you’re going for waves. As I mentioned in a previous post, t-shirt drying is much safer than towel drying and it helps to eliminate frizz big time.
c. This is an extremely raised cuticle. Main causes are bleaching, over-processing with color, over-styling with heat, using too many alcohol based products in conjunction with heat styling, shampooing and not conditioning, etc… This is bad news. When your cuticle looks like this your hair will appear dull, and lifeless. It can’t reflect shine when the surface is broken up this way. Hair Bootcamp is a must for this hair. (Which just so happens to be one of my posts for next week!) If you don’t change your routine, you’ll be looking at breakage very soon.
d. Here we have a piece of hair that WILL eventually break off. This was most likely caused by harsh detangling. Never rush through a knot. Take your time and comb it out slowly. I also recommend getting knots out with a brush instead of a comb. Sometimes the single row of teeth on a comb can actually tighten the knot. I always work knots out slowly with a brush. Another may-jor cause of this is yanking out a ponytail holder. Stop yourself and work the tangle around the ponytail holder out slowly. Sadly, once this has happened in the middle of a piece of hair, it’s definitely coming off. Collect a bunch of these and you’ve got yourself a nice case of the fly-aways! Booooo.
e. Well hello split-end. This is the enemy!! I’m actually really happy that you guys are seeing this because just knowing what split ends looks like will help you understand how they get stuck on each other. They’re like claws that can grab onto one another causing tangles. Tangled ends cause even further damage. It’s important to get them off regularly.
f. This is knotted hair. If not properly and carefully brushed out, a knot will lead to “example d.” If you gently brush it out, you can avoid that. (Also, this is just a really cool look at knotted hair!)
g. This is a shattered hair shaft. This can be caused by a bad application or rough removal of extensions. Another cause could be a bad perm (solution, the way it’s wrapped and how it’s processed). Not sure too many of you are getting perms, but if you are, please be sure to visit someone who specializes in that. Not just someone who will say yes because they want to make the money from the service. If you have extensions, make sure the person doing them is gentle, takes their time and isn’t too aggressive with your delicate hair!
Whatever kind of hair you have, you’re now one big step closer to “example a.” above. We’ve got to be good to our hair! Learn it + love it. xLabel: beauty, hair, must read, tips
Jumat, 05 Agustus 2011 @ 21.35
Fasten your seat belts ladies! I have spent a lot of time traveling in the last couple months which can really take a toll on your appearance. So I thought I would share a couple of helpful beauty tips that I have picked up along the way.
- Moisturize! I can’t stress this one enough. The recycled air in the plane can really dry out your pretty skin. The night before you are headed to the airport be sure to use a good moisturizer and lots of it. Also don’t forget to include both a travel sized face and lip moisturizer in your carry-on luggage to use during the flight.
- It’s time to “takeoff”… your makeup! If you are like me and dread the thought of strolling though the airport bare faced, then pack some makeup removing wipes in your bag. Then, once you have boarded the plane, remove your makeup and apply a layer of moisturizer.
- Avoid carbonation and salty foods. I know this one is a challenge considering the first things to be served on a plane are salted nuts and soda, but stay strong ladies! Instead opt for some herbal tea or good old H2O. Also try packing your own snacks. Things like unsalted nuts or dried fruit make an excellent in-flight treat and won’t leave you puffy or bloated. It is also smart to avoid alcohol (sorry!) because it is more likely to make you dehydrated.
- Some of you might experience swelling in your hands and feet while flying. One way to avoid this is by wearing compression socks. They aren’t the most fashionable items, but they keep your tootsies from swelling up during the flight.
- Freshen up! Most perfume bottles exceed the limit of liquid ounces allowed through security and have to travel in our checked luggage, but no one wants to arrive at their final destination smelling like a 747. Next time you fly pack a couple of perfume samples with you. They work just as well and won’t be confiscated in security.
Label: beauty, flight, tips
Sabtu, 23 Juli 2011 @ 02.31
Dear everyone,It’s the weekend. We hope you’re going to be doing something fun and exciting. Know what’s not fun and exciting? The fact that bacteria collects on the surface of your phone while in your purse. That bacteria makes it’s way to your face and causes blackheads, blemishes + sometimes full breakouts. It’s like rubbing your face in the bottom of your handbag! Ew. Interestingly, skin care experts + dermatologists can usually tell which side you use most when talking on the phone. Take a quick minute to wipe it down with a dab rubbing alcohol on a cloth! It will kill the bacteria and save you a lot of time in the long run!xxLabel: phones, tips
Selasa, 12 Juli 2011 @ 00.40
these are the things I love to do at summer ;)- go for a bike ride
- laugh so hard that I cry
- have a movie night with girlfriends
- go for a swim in the ocean and then air dry in the sun
- order dessert and eat the whole thing
- paint a room a new random color
- make a bubble bath and stay in it until all the bubbles are gone
- research amazing vacation destinations, even if I’m not going to go
- break open lavender + gardenias
- putting peonies all over my house for the 2.5 months they’re in season
- read a book on a hammock
- run through sprinklers
- sit outside at dusk and watch lightning bugs
- make popcorn and watch Gone with the Wind
you should go try it to! have a good summer fellas <3 Label: summer, tips
Kamis, 07 Juli 2011 @ 06.22
I hope that everyone had a fun and safe holiday weekend! And if your weekend was anything like mine, then you spent plenty of time in the sunshine. While those early summer days are oh-so-enjoyable, they can sometime leave you with an unwanted souvenir… a sunburn! I was able to avoid the burn this time around (mostly because the majority of my time was spent hiding under a giant floppy hat + umbrella while reapplying sunscreen hourly), but for the less protected, I’ve provided some suggestions for after the damage has been done:
Here are a few tips on how to deal with those less than desirable sunburns…
- Take Vitamin E to reduce inflammation from your sunburn. Drink lots of water to stay hydrated.
- Eat foods high in vitamin c (citrus fruits, strawberries, spinach), beta-carotene (chili peppers, kale, carrots), vitamin E (nuts, olives) or flax seed oil. Sliced cucumbers or cold wet tea bags help soothe and extract the sting
- Take a cool shower.
- Avoid using any harsh soaps + perfumes on sunburned area.
- Keep skin moisturized. Try using a lotion with shea butter or palm oils for extra moisture.
Here are my favorite “Kitchen Beautician” remedies for a mild sunburn…
- Mix lavender oil and water together in a small spray bottle and keep it in your refrigerator. Mist your skin throughout the day to soothe the burn.
- Aloe vera can relive the pain of a sunburn. Try filling an ice tray with aloe vera and freezing it. Rub the frozen cubes onto the burn area.
- Mix baking soda into your bath and soak for about 15 minutes. Let skin air dry instead of drying off with a towel.
- Witch hazel has been known to reduce inflammation. It can be applied to a burn with a cotton ball or added to a bath.
Label: beauty, style, sunburn, tips
|
Natasha ♥
YOU KNOW YOU LOVE ME

Hi there. I'm Natasha Diva, I'm 16 years old. Currently living in Jakaera, Indonesia. Well. I love pink, I'm girly, I'm simple, I'm good. Chocolate is my guilty pleasure. Late night dramas are my thing. I don't believe in monsters, but I suspect there's on in my closet eating up all my Chanel bags. A huge fan of PINK from Victoria's Secret. xo
What more can I say? (:
Twitter

|
|
|
|